Introduction
3D printing has completely transformed the way we make products. You can create and print a 3D model with only a few clicks using a 3D printer. But there are a lot of variables that influence the printing process and can make it complicated. One of the important components of 3D printing is the heat break. A simple but crucial component called a heat break aids in controlling the filament’s temperature during printing. We’ll discuss a heat break’s definition, operation, and significance in 3D printing in this blog post.
We will cover various types of heat breaks, their installation, and maintenance. You will gain insight into how heat breaks work and benefit your 3D printing projects. The article will provide you with a comprehensive understanding of heat breaks in 3D printing. After reading, you will be equipped with the knowledge to make informed decisions regarding heat breaks.
Start with a brief explanation of 3D printing and how it works
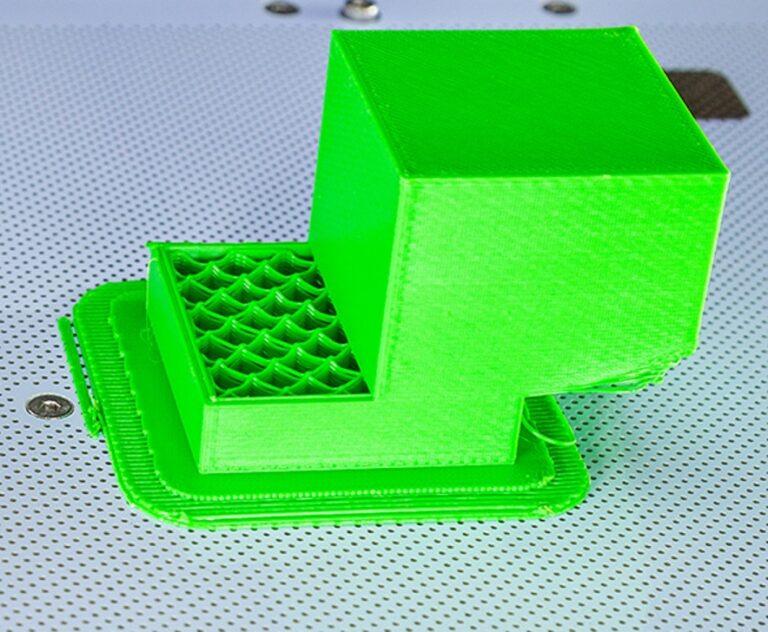
3D printing is a manufacturing process. It is also called additive manufacturing. The process creates three-dimensional objects. It involves layering materials on top of each other. Specialized software slices a digital model into thin layers to begin the 3D printing process. The 3D printer builds the object layer by layer. It uses different materials like plastic, metal, or food. The process is additive, meaning it adds material to create the object. The printer reads a digital file to determine how to build the object. It’s a flexible technology with applications in many fields.
The printer deposits material on the build platform or previous layer using a nozzle or other method. It works by layering the material. The material is deposited in a predetermined pattern. Each layer is printed on top of the previous layer. The process continues until the object is fully printed. The 3D printer melts, solidifies, or otherwise hardens the material to create a solid layer. The printer then moves up a fraction of a millimeter and repeats the process until the entire object is complete.
Properly regulating the temperature of the filament throughout the printing process is one of the key challenges in 3D printing. If the filament gets too hot, it can cause clogs, burn the material, or lead to poor print quality. The heat break regulates the temperature and prevents heat from traveling up the filament. It ensures a consistent and controlled printing process. The heat break is the solution for preventing filament clogs and improving print quality.
heat breaks and their importance in 3D printing
Heat breaks are crucial for 3D printing with high-temperature materials or small nozzle diameters. They prevent heat from creeping up and clogging the nozzle. They help maintain a consistent temperature throughout the hot end. This results in improved print quality and fewer failed prints. Without a heat break, the filament is susceptible to overheating, which can cause blockages, subpar print quality, and other problems. Heat breakers establish a temperature gradient. This gradient stops heat from moving up the filament. It allows the filament to cool and solidify. This occurs before it reaches the nozzle.
We’ll explore heat breaks’ definition, operation, and significance in 3D printing in this blog post. We will review various types of heat breaks, like all-metal and PTFE-lined ones. We’ll also cover hybrid heat breaks and compare their pros and cons. This information will help you select the right heat break for your 3D printing needs.
We’ll also go over advice for effectively installing and maintaining heat breaks for maximum efficiency. By the end of this article, you’ll have a better knowledge of heat breaks. It will help you understand how they might benefit your 3D printing endeavors.
What is a heat break?
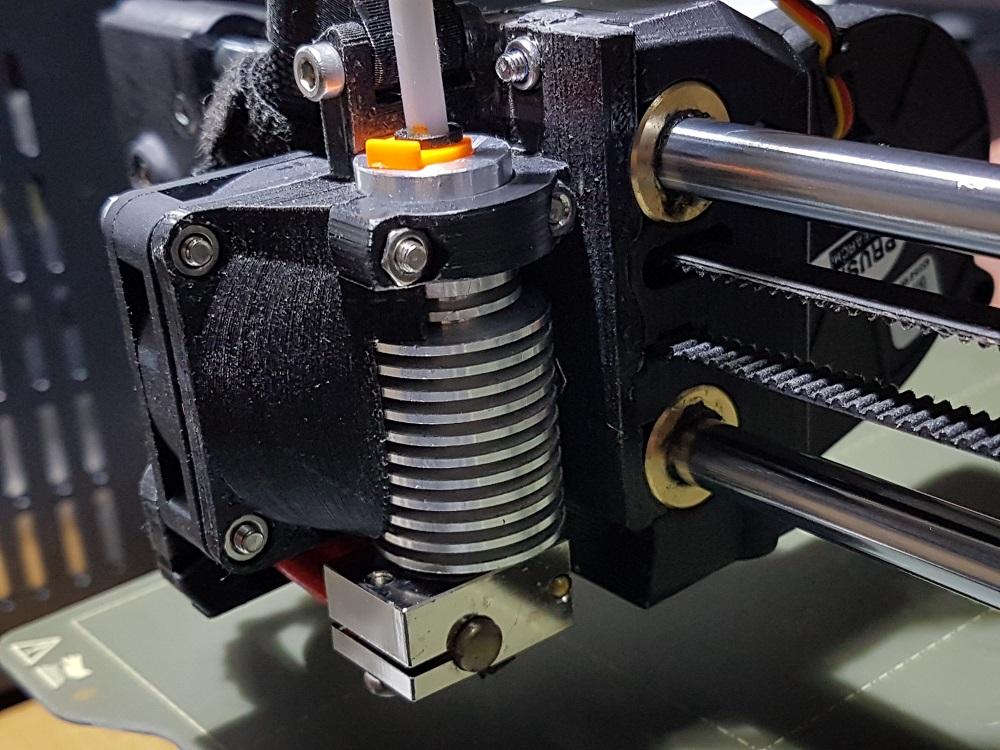
A heat break is a tiny but crucial part of the hot end assembly of a 3D printer. A heat break is a tube-shaped device. It is placed between the heater block and the nozzle. It helps to manage the temperature of the filament. The filament passes through the hot end.
The heatsink, the heat break tube, and the nozzle are the three primary components of the heat break. A metal block called the heatsink aids in transferring heat away from the hot end. The heat break tube separates the heater block and nozzle. It acts as a thermal barrier to prevent heat transfer. It helps to avoid heat rising up the filament. The nozzle is the component that extrudes the melted filament onto the build platform.
heat break’s function
The heat break tube is crucial for the heat break’s function. It is responsible for creating the thermal barrier. The heat break ensures that the hot end stays hot. It prevents the filament from melting too early. Manufacturers often construct it with materials such as stainless steel, which has good thermal conductivity. They may also coat it in PTFE or another low-friction substance to reduce wear and friction.
The heat break works by establishing a temperature difference along the length of the tube. The printer heats the heater block and keeps the nozzle cool to prevent the filament from melting. The heat break tube facilitates the transition between the two temperatures. The tube helps cool and solidify the filament before it enters the nozzle.
The heat break produces a temperature differential. It prevents heat from flowing up the filament. This reduces the chance of clogs and other printing difficulties. The heat break also allows for more precise control over the printing process. It is especially helpful when working with high-temperature materials or small nozzle diameters.
Define what a heat break is and how it fits into the 3D printing process
A heat break is a small but crucial component in 3D printing. It ensures quality and consistency. The heat break is located in the hot end assembly of the 3D printer. It serves as a barrier between the heater block and the nozzle.
The heat break prevents heat from traveling up the filament and into the cold zone of the hot end. If the filament gets too hot too soon, it can cause issues. The issues may include clogs, oozing, and stringing. Such problems can result from the filament melting too quickly. Rapid melting can happen if the filament gets too hot too soon. It is important to prevent these issues in 3D printing. Using a heat break can help avoid such problems. The heat break allows for better control over the printing process.
The heat break works by creating a thermal barrier that separates the hot and cold zones of the hot end. It does this by utilizing two different materials with different thermal conductivities. Manufacturers create the upper part of the heat break with high thermal conductivity materials. These materials include aluminum or copper. The lower part of the heat break is made from materials with lower thermal conductivity. Materials such as stainless steel or titanium are used for this part. This design allows for efficient heat transfer at the top and minimizes heat transfer at the bottom.
Temperature gradient
The heat break creates a temperature gradient. This gradient ensures the filament stays at the correct temperature. The filament won’t become overheated or melt prematurely. This maintains proper printing conditions. By keeping the filament at a consistent temperature, the heat break enables the printer to produce accurate, high-quality prints. The heat break is crucial in 3D printing. It is especially important when using high-temperature materials. Small nozzle sizes also benefit from using a heat break. Overall, it plays an essential role in the 3D printing process. It allows for precise control over the printing process, resulting in high-quality prints with minimal defects.
Explain its role in regulating the temperature of the filament during printing
The heat break regulates the filament temperature during printing. It plays a critical role in the success of 3D printing projects. A properly functioning heat break ensures smooth and reliable printing. Temperature control is vital for avoiding filament clogs or jams. The hot end applies high temperatures to the filament to melt the plastic and extrude it through the nozzle. Exposing the filament to high temperatures for an extended period of time can cause it to overheat and deform. The filament can also melt prematurely due to prolonged exposure to high temperatures. This can cause issues like clogs or extrusion problems, which can ruin the quality of the final print.
A thermal barrier is created to stop heat creep. The barrier cools and solidifies the filament. The heat break uses two materials with different thermal conductivities. The upper part uses high thermal conductivity materials such as aluminum or copper. It directs the heat away from the heater block efficiently.
Manufacturers use a low thermal conductivity material, like stainless steel or titanium, to build the bottom half of the heat break closer to the nozzle. It allows the filament to cool and harden before it reaches the nozzle. The heat break keeps the filament temperature consistent during printing. It creates a thermal gradient to maintain a consistent temperature as it goes through the hot end. Consistent temperature is important when printing with high-temperature materials or small nozzle sizes. Small temperature fluctuations can significantly impact the final print quality.
Components of a heat break
The top and lower sections are the two main parts of a heat break. The top portion is closest to the heater block and is made of copper or aluminum with high thermal conductivity. This transfers heat from the heater block to the lower part. Manufacturers use titanium or stainless steel for the lower part closest to the nozzle. This is because they have low thermal conductivity. This area is in charge of bringing the filament’s temperature down before it enters the nozzle. A thermal barrier forms between the filament and the hot end’s cold zone. This prevents heat from moving up the filament and into the cold zone. The heat break’s length and design may vary depending on the printer and filament. But the fundamental elements of the heat break do not change.
Discuss the main components of a heat break: the heatsink, the heat break tube, and the nozzle
Several components work together in the heat break to regulate the temperature of the filament during printing. The main components of a heat break are the heatsink, the heat break tube, and the nozzle.
heatsink
The heatsink is the component that is responsible for dissipating heat away from the hot end. A heat sink has high thermal conductivity and maximizes surface area for heat dissipation. It is typically made of aluminum. The user mounts it on top of the heat block. It is often equipped with a fan to aid in cooling.
heat break tube
The heat break tube is part of the heat break that creates the thermal barrier between the hot and cold zones of the hot end. Typically, manufacturers make it from a material with low thermal conductivity, such as stainless steel or titanium, and they design it to be as thin as possible while still maintaining structural integrity. The heat break tube extends from the top of the heat sink down to the nozzle, and it is where the filament travels on its way to the extruder.
nozzle
The nozzle is the final component of the heat break and is responsible for extruding the melted filament onto the print bed. Typically, manufacturers make it of brass or another heat-conductive material, and they design it to be interchangeable so that the print can meet different requirements of nozzle sizes.
Together, these components work to regulate the temperature of the filament during printing by creating a thermal barrier and maintaining a consistent temperature throughout the hot end. By dissipating heat away from the heater block, reducing the temperature of the filament before it reaches the nozzle, and extruding the melted filament at the correct temperature, the heat break plays a crucial role in ensuring the success of any 3D printing project.
Explain how they work together to create a temperature gradient that prevents heat from traveling up the filament
The components of a heat break work together to create a temperature gradient that prevents heat from traveling up the filament. When in operation, the hot end heats the heat block to a high temperature in order to melt the filament. The heatsink is responsible for dissipating the heat away from the heat block and into the surrounding environment. This helps to prevent heat from traveling up the heat break and into the filament.
The heat break tube creates a thermal barrier that separates the hot and cold zones of the hot end. It creates a gradual decrease in temperature for the filament as it travels down the heat break. The heat break tube, made of materials with low thermal conductivity such as stainless steel or titanium, reduces the temperature of the filament. This material helps to reduce the temperature of the filament before it reaches the nozzle.
The nozzle is responsible for extruding the melted filament onto the print bed. The manufacturer designs the heat break to allow for interchangeability, so the user can choose different nozzle sizes depending on the print requirements. The heat break terminates with the nozzle, usually made of brass or other heat-conductive materials. To maintain the appropriate extrusion temperature of the filament, the user exposes the nozzle to the lowest temperature of the three components.
Together, these components create a temperature gradient that prevents heat from traveling up the filament. By dissipating heat away from the heat block, reducing the temperature of the filament before it reaches the nozzle, and extruding the melted filament at the correct temperature, the heat break helps to ensure that the 3D printing process is successful and produces high-quality prints.
Benefits of using a heat break
There are many advantages to 3D printing with a heat break. One of the main advantages is that it aids in stopping heat from rising up the filament, which can result in issues like clogging and uneven extrusion. The heat break regulates filament temperature by forming a thermal barrier, ensuring that the filament melts at the proper temperature and extrudes smoothly.
Using a heat break gives 3D printers more flexibility in the kinds of materials they can use, making it another advantage. Without a heat break, certain materials may be difficult to print due to their high melting points or other features. Utilizing a heat break to control temperature allows you to print a wider range of materials, including those that require higher temperatures to melt.
Additionally, employing a heat break may aid to raise the general caliber of 3D printers. The temperature gradient created by the heat break enables the filament to be extruded at a constant temperature, which can result in smoother and more accurate prints. Additionally, it lessens the possibility of under or over-extrusion, which can lead to prints with poor form.
Using a heat break in the 3D printing process offers many advantages, including increased flexibility in the types of materials you can use, improved print quality, and reduced risk of clogs and other issues. As a result, it is an essential step in the 3D printing process, especially for those aiming to produce high-quality prints repeatedly.
Highlight the benefits of using a heat break in 3D printing, including improved print quality, reduced risk of clogs, and better control over the printing process
A heat break in 3D printing offers various benefits for print quality and consistency. It creates a temperature gradient for correct filament melting and smooth extrusion. This leads to accurate, smoother prints with fewer defects. Heat breaks can also reduce the risk of clogs, which are frustrating and disrupt the printing process. They provide better control, allowing users to experiment with different materials. This results in more precise and consistent prints. In conclusion, heat breaks are valuable for achieving high-quality 3D printing outcomes.
improved print quality
The enhanced print quality that a heat break offers are among the most important advantages of using it in 3D printing. The heat break enables the control of the filament’s temperature, which is crucial for producing precise and high-quality prints. A heat break ensures that the printer melts the filament at the proper temperature and extrudes it smoothly, resulting in more accurate, smoother prints with fewer flaws. If the printer lacks a heat break, it may result in lower print quality due to issues such as under or over-extrusion, or the filament temperature is inconsistent. It does this by forming a thermal barrier and a temperature gradient. Because of this, a heat break is a useful tool for anyone trying to produce 3D prints that are reliable and of high quality.
reduced risk of clogs
Another important benefit of using a heat break in 3D printing is the reduced risk of clogs. When heat moves up the filament and causes it to melt too soon, clogs can happen. This causes a blockage in the nozzle or heat break tube. This can be irritating for 3D printing fans since it can destroy a print and require time-consuming maintenance to restore. Using a heat break ensures that the temperature gradient directs the filament to melt only in the nozzle, rather than in the heat break tube. This reduces the possibility of blockages and ensures a smooth and reliable extrusion process. It not only saves time and effort but also allows for more efficient and precise 3D printing.
better control over the printing process
sing a heat break in 3D printing also provides better control over the printing process. The heat break regulates the temperature of the filament, enabling the printer to print a wider range of materials with varying melting points. This allows users to experiment with different materials and achieve different results in their prints. Additionally, the temperature gradient created by the heat break allows for better control over the extrusion process, resulting in more precise and consistent prints. This level of control is particularly important for professional use cases, where precision and consistency are key factors in achieving the desired end result. As such, a heat break can be an essential component for anyone looking to have greater control over the 3D printing process.
Provide examples of when a heat break is especially useful, such as when printing with high-temperature materials or when printing with a small nozzle size
When using high-temperature materials or tiny nozzle sizes in 3D printing, a heat break can be especially helpful. A heat break can help prevent heat creep, which happens when the heat from the extruder reaches the cooler parts of the printer and causes the filament to soften too soon when printing with high-temperature materials like Nylon or Polycarbonate. This can lead to clogs and other printing issues. Using a heat break allows for more precise control over the temperature of the filament, which reduces the risk of heat creep and improves the overall print quality.
Similarly to this, a heat break can help ensure that the filament melts only in the nozzle and not in the heat break tube when utilizing a tiny nozzle size. This can aid in preventing blockages and enable more exact extrusion, both of which are crucial for printing elaborate or detailed patterns. In addition, the usage of a heat break can also allow for more consistent printing with small nozzle sizes, which can aid to generate high-quality prints with fine details.
Overall, when using high-temperature materials or small nozzle diameters in 3D printing, the usage of a heat break can be extremely advantageous. A heat break can help ensure that 3D printing is done more efficiently and with greater precision by regulating the temperature of the filament and preventing clogs. This leads to high-quality and consistent prints.
printing with high-temperature materials
Due to these materials’ high melting points, printing with high-temperature materials like Nylon, Polycarbonate, or even PEEK might be difficult. The filament may prematurely soften and deform due to these high temperatures, resulting in clogs and other printing problems. This is where taking a heat break is helpful. The heat break generates a temperature gradient that controls the filament’s temperature as it passes through the extruder, aiding in preventing heat creep and ensuring that the filament is only melted in the nozzle. This can make it simpler to work with high-temperature materials by producing prints that are smoother, more accurate, and have fewer printing problems. By lessening stress on the extruder and other parts of the printer, the usage of a heat break can also contribute to a longer printer lifespan.
printing with a small nozzle size
Printing with a small nozzle size is a common practice in 3D printing, especially when it comes to creating highly detailed or intricate designs. However, using a small nozzle size can also make the printing process more challenging due to the increased risk of clogs and other issues. This is where a heat break can be especially useful. The heat break creates a temperature gradient that ensures the filament melts only in the nozzle and not in the heat break tube, helping to prevent clogs and other issues associated with small nozzle sizes. Additionally, the use of a heat break can also allow for more precise extrusion, leading to higher-quality prints with finer details. Overall, the use of a heat break can help to make printing with a small nozzle size more efficient and effective, resulting in high-quality prints that are free from clogs and other issues.
Types of heat breaks
Choosing the best heat break depends on several factors such as the printer’s design, the materials you are using, and the intended printing application. There are various types of heat breaks on the market.
all-metal heat breaks
One of the most popular forms of heat breaks is the all-metal heat break, which typically consists of titanium or stainless steel and is built entirely of metal. This kind of heat break is excellent for printing with unusual filaments like PEEK or ULTEM since it is extremely robust and can resist high-temperature materials.
People generally consider all-metal heat breaks as the most durable and reliable type of heat break, as they consist entirely of metal and can endure high-temperature materials. However, they require careful tuning and calibration to ensure that the temperature gradient is correct, and they may not be suitable for use with materials that are prone to jamming or require high printing speeds.
PTFE-lined heat breaks
A heat break that has a PTFE lining inside the heat break tube is another form of heat break. This liner acts as heat insulation to prevent the filament from prematurely weakening while also assisting in reducing friction and preventing blockages. For printing with more widely used, lower melting-point materials like PLA or ABS, PTFE-lined heat breaks are frequently employed.
PTFE-lined heat breaks are a popular choice for use with lower-temperature materials like PLA or ABS, as the PTFE lining helps to reduce friction and prevent clogs while also providing thermal insulation. However, PTFE-lined heat breaks may not be suitable for use with high-temperature materials or with abrasive filaments like carbon fiber or metal-filled materials, as the PTFE lining can wear out over time.
hybrid heat breaks
The coated heat break is a third kind of heat break that has a layer of unique coating put inside the heat break tube. This coating serves as thermal insulation while assisting in the reduction of friction and the prevention of blockages. In terms of durability and usability, coated heat breaks are a nice middle ground between all-metal and PTFE-lined heat breaks. To get the greatest results, it’s crucial to choose the right kind of heat break, which ultimately depends on the needs of the printer and the materials being utilized.
Hybrid heat breaks are a newer type of heat break that combines elements of both all-metal and PTFE-lined heat breaks. They typically feature a short section of PTFE tubing at the top of the heat break, where the filament enters the nozzle, and an all-metal section further down where the filament is melted and extruded. This design helps to prevent clogs while still allowing for the use of high-temperature materials. Hybrid heat breaks can be a good choice for users who need to print with a wide range of materials and temperatures, as they offer the best of both worlds in terms of durability and ease of use. However, they may require more frequent maintenance and tuning to ensure that the temperature gradient is correct and that the PTFE tubing is not damaged.
Coated heat break
Coated heat breaks are a relatively new type of heat break that feature a special coating applied to the inside of the heat break tube. This coating helps to reduce friction and prevent clogs, while also providing thermal insulation. Coated heat breaks are a good compromise between all-metal and PTFE-lined heat breaks, as they offer both durability and ease of use. They are suitable for use with a wide range of materials, including high-temperature and abrasive filaments. However, they may be more expensive than other types of heat breaks, and their durability may depend on the quality of the coating and the specific application.
A small layer of a specific coating is applied to the inner surface of coated heat breaks, a form of heat break. The purpose of this coating is to increase thermal conductivity, which aids in stabilizing temperature gradients and preventing heat creep. In high-temperature situations where other forms of heat breaks could find it difficult to maintain stable temperatures, coated heat breaks are frequently used. The coating may be formed of materials with high heat conductivity and corrosion and wear resistance, such as titanium nitride or ceramic. Even though coated heat breaks can cost more than other kinds of heat breaks, they are often a great option for users who need to print with high-temperature materials and need precise temperature control.
Compare and contrast the pros and cons of each type
here is a comparison table outlining the pros and cons of each type of heat break:
| Type of Heat Break | Pros | Cons |
|---|---|---|
| All-metal heat break | -Can handle high temperatures -Good thermal conductivity -Durable and long-lasting | -Can be prone to clogs -Not suitable for all materials -May require frequent tuning |
| PTFE-lined heat break | -Low friction -Resistant to clogs -Easy to use and maintain | -Limited to lower-temperature materials -Can degrade over time, leading to clogs -May not provide precise temperature control |
| Hybrid heat break | -Can handle high temperatures -Prevents clogs -Good temperature control | -May require more maintenance and tuning -Higher cost than other types of heat breaks -Some users may find it more difficult to use |
| Coated heat break | -Good thermal conductivity -Resistant to wear and corrosion -Precise temperature control | -More expensive than other types of heat breaks -Limited availability -May require more maintenance and cleaning |
It’s important to note that the pros and cons listed here are generalizations and may not apply to every specific brand or model of heat break. Users should do their own research and choose the type of heat break that best meets their individual needs and preferences.
Installation and maintenance
Installing and maintaining a heat break in a 3D printer is a relatively straightforward process, but it does require some attention to detail. Most heat breaks come with installation instructions that should be followed carefully, and it’s important to ensure that the heat break is properly seated and tightened in place to prevent leaks and ensure consistent performance.
Regular maintenance is also important to keep the heat break functioning properly. This may include periodic cleaning to remove any buildup of debris or filament, as well as checking for wear and tear on the various components of the heat break. Some heat breaks may require more frequent maintenance than others, depending on factors such as the type of material being printed and the printing conditions.
It’s also worth noting that some heat breaks may require specialized tools or knowledge to install or maintain, so users should be sure to read the manufacturer’s instructions carefully and, if necessary, seek out additional guidance or assistance from knowledgeable sources. Proper installation and maintenance of a heat break can help ensure that a 3D printer runs smoothly and produces high-quality prints.
Tips on how to install a heat break correctly, including how to avoid common mistakes
Although installing a heat break in a 3D printer can appear difficult, with the right instructions, it’s actually rather easy. Here are some pointers on how to properly install a heat break and steer clear of typical errors:
- Read and follow the manufacturer’s instructions: Prior to installing the heat break, always read and abide by the manufacturer’s instructions carefully. This will guarantee that you are installing it properly and that no crucial steps are skipped.
- Disassemble the hot end: You must disassemble the hot end prior to installing the heat break. The nozzle, heater block, and any other obstructions will need to be taken out in order to accomplish this. Observe caution and keep a record of all the components as you complete this.
- Before installing the heat break, it is crucial to properly clean the hotel. This will clear out any debris or filament that may have gathered and resulted in clogs or other issues.
- Install the heat break: The heat break can be installed after the hot end has been cleaned and disassembled. For constant functioning and to avoid leaks, make sure it is seated and fastened in place. Reassemble the hot end:
- Following the installation of the heat break, the hot end can be put back together by reinstalling the nozzle, heater block, and other parts. Be sure to closely adhere to the manufacturer’s directions and tighten everything up firmly.
Avoiding common mistakes while installing a heat break includes using the incorrect equipment, over- or under-tightening the components, and not thoroughly cleaning the hot end before installation. You can make sure that your heat break is installed appropriately and that your 3D printer creates prints of good quality by paying attention to these suggestions and avoiding these blunders.
How to properly maintain a heat break to ensure it continues to function properly
Proper maintenance is essential to ensure that the heat break continues to function properly. One of the most important steps in maintaining a heat break is to regularly clean it. Filament residue and other debris can accumulate inside the heat break tube and nozzle over time, which can affect the temperature gradient and cause clogs. To clean the heat break, it is recommended to disassemble the hot end and use a cleaning filament or other cleaning tool to remove any debris.
Another important step in maintaining a heat break is to ensure that it is properly lubricated. The threads of the heat break and nozzle should be lubricated with a small amount of high-temperature grease to prevent them from binding or seizing. It is important not to over-lubricate, as excess grease can attract debris and cause clogs.
Regularly inspecting the heat break for signs of wear or damage is also recommended. If the heat break tube or nozzle is damaged, it should be replaced immediately to ensure that the hot end continues to function properly.
Finally, it is important to use high-quality filament and avoid overheating the filament, which can cause it to degrade and leave residue inside the heat break. Proper temperature and speed settings should be used to ensure that the filament is melted and extruded smoothly without overheating. By following these maintenance tips, a heat break can continue to function properly for many prints.
Conclusion
In conclusion, a heat break is an essential component in 3D printing that helps regulate the temperature of the filament during printing. By preventing heat from traveling up the filament, a heat break can improve print quality, reduce the risk of clogs, and give better control over the printing process. There are different types of heat breaks available, including all-metal, PTFE-lined, hybrid, and coated heat breaks, each with their own pros and cons.
Proper installation and maintenance are critical to ensure that the heat break continues to function properly. To install a heat break correctly, it is important to follow the manufacturer’s instructions and avoid common mistakes such as over-tightening or using excessive force. Regular cleaning, lubrication, and inspection are recommended to keep the heat break functioning properly. Using high-quality filament and proper temperature and speed settings are also important to avoid clogs and ensure smooth printing.
By understanding the importance of heat breaks and following proper installation and maintenance tips, 3D printing enthusiasts can ensure that their prints are of high quality and free from issues caused by heat creep or clogs.
The main points of the blog post
- 3D printing is a process that involves melting and extruding filament to create an object layer by layer.
- A heat break is an essential component in 3D printing that helps regulate the temperature of the filament during printing.
- The main components of a heat break are the heatsink, the heat break tube, and the nozzle.
- A heat break works by creating a temperature gradient that prevents heat from traveling up the filament.
- Benefits of using a heat break include improved print quality, reduced risk of clogs, and better control over the printing process.
- Different types of heat breaks available include all-metal, PTFE-lined, hybrid, and coated heat breaks, each with its own pros and cons.
- Proper installation and maintenance are critical to ensure that the heat break continues to function properly.
- Tips for installing a heat break include following the manufacturer’s instructions and avoiding common mistakes.
- Tips for maintaining a heat break include regular cleaning, lubrication, and inspection, using high-quality filament, and proper temperature and speed settings.
- By understanding the importance of heat breaks and following proper installation and maintenance tips, 3D printing enthusiasts can ensure that their prints are of high quality and free from issues caused by heat creep or clogs.
Consider using a heat break for better 3D printing results
In summary, a heat break can significantly enhance print quality, lower the chance of clogs, and allow better control over the printing process in 3D printing. When printing with hot materials or small nozzle sizes, it is extremely helpful. There are many different kinds of heat breaks available, and each has advantages and disadvantages. The heat break must be installed and maintained correctly to work properly. Overall, for the ideal outcomes, we strongly advise taking into account the advantages of utilizing a heat break in your 3D printing tasks.
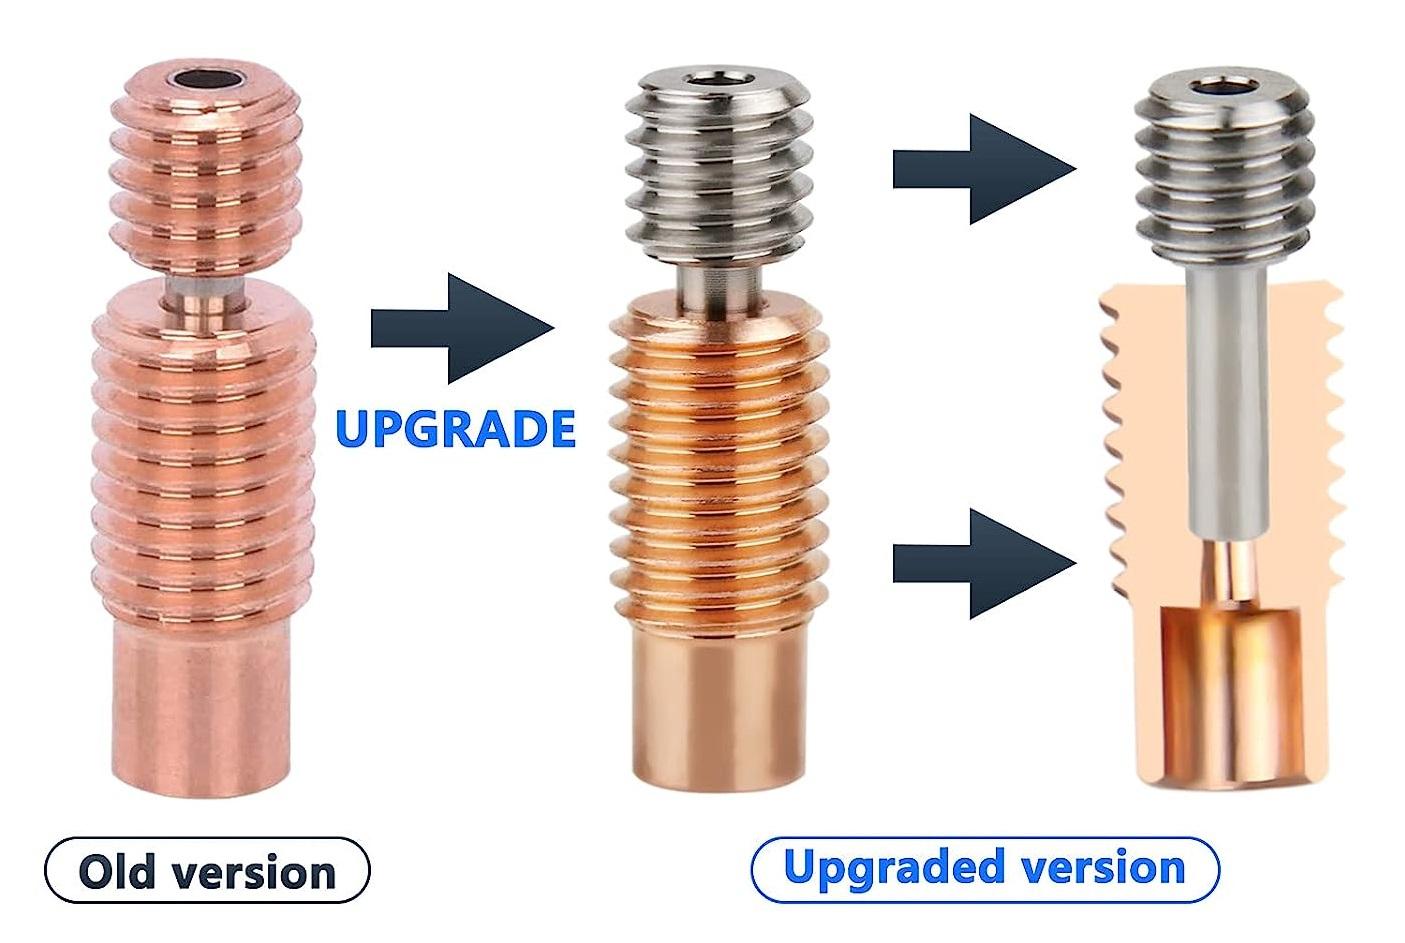
How to Install a Bimetallic Heat Break
Time needed: 1 hour
If you want to install a new heat break to your 3D printer, follow these steps to do it correctly:
- Remove the Hot End Enclosure
Remove the hot end enclosure. The process may vary depending on your 3D printer but generally involves removing a couple of screws to access the hot end.
- Detach Nozzle
Remove the nozzle using the provided metal wrench or nozzle wrench.
- Loosen Heat Block Screws
Loosen the screws on the heat block sides, if your 3D printer has them.
- Remove Grub Screw from Heat Sink
Remove the grub screw at the bottom of the heat sink, which holds the top of the heat break in place.
- Detach Coupler and PTFE Tube
Remove the coupler from the top of the heat sink that holds the PTFE tube.
- Extract PTFE Tube
Remove the PTFE tube using pliers if necessary.
- Remove Old Heat Break
Pull the heat block downwards to remove the heat break from the heat sink, being careful not to pull on the wires. Unscrew the heat break to remove it. You may need pliers if it’s too tight, or you can heat the hot end to 180C to make it easier.
- Install Bimetallic Heat Break and Replace Nozzle
Screw the new bimetallic heat break, ensuring the top of the lower part is parallel to the heat block. Reattach the nozzle and tighten it as much as possible. It’s recommended to replace the nozzle at this point.
- Secure Side Screws
Install the two side screws without overtightening them.
- Reattach PTFE Coupler and Tube
Screw in the PTFE coupler and push the PTFE tube into the heat sink, making sure it’s as far as possible. Remember to remove the tube from the PTFE coupler first by pressing the plastic button on top and then pulling it off.
FAQs
It is possible to print without a heat break, but it can result in clogs and poor print quality. A heat break helps to prevent heat creep, which can cause the filament to melt prematurely and clog the hot end
The frequency of heat break replacement will depend on factors such as usage and material types. However, a good rule of thumb is to inspect and clean your heat break every few hundred hours of printing and replace it if you notice signs of wear or damage.
It is not recommended to reuse a heat break after cleaning it, as the cleaning process can cause microscopic damage to the surface that can affect its performance. It is best to replace a heat break if it shows signs of wear or damage.
Heat breaks are compatible with most 3D printers that have a hot end. However, it is important to ensure that the heat break you choose is the correct size and type for your printer’s hot end.
Yes, a heat break can be used with a wide variety of filament types. However, it is important to ensure that the temperature settings are appropriate for the specific filament being used to prevent clogs or other issues.