Introduction
AutoCAD for 3D printing has established itself as a crucial tool for designers, artists, engineers, and other professionals. The creative sector of 3D printing has witnessed a major increase in popularity recently. 3D printing enables new possibilities for making three-dimensional objects. Outstanding 3D prints require expertise and knowledge. An in-depth understanding of design principles is necessary. Software programs like AutoCAD for 3D printing can help optimize outcomes.
AutoCAD is a CAD program used for years by designers and engineers. It produces high-quality 2D and 3D designs in architecture, engineering, and manufacturing. Its robust capabilities enable users to create complex 3D models. These models can be printed in 3D using AutoCAD’s 3D printing capabilities.
Using AutoCAD for 3D printing has opened up a world of possibilities for professionals in various fields. With its advanced features and tools, it can produce intricate and high-quality 3D prints easily. This article will explore AutoCAD’s potential for 3D printing and provide tips on how to create 3D prints using AutoCAD. We’ll discuss preparing designs for 3D printing. We’ll talk about the importance of this step. Procedures involved in producing drawings using 3D printing software will also be covered.
This article will help readers use AutoCAD for high-quality 3D prints. Resources will be provided to get started. AutoCAD for 3D printing can be a game-changer for designers, engineers, and artists. It offers many benefits for their work. By the end of this article, readers will know how to use AutoCAD for 3D printing.
Introduce AutoCAD for 3D Printing
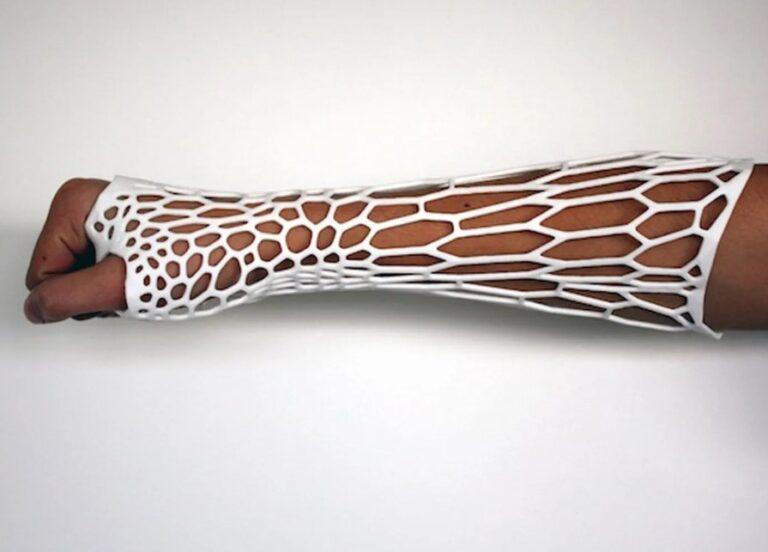
Create three-dimensional products from a digital file using 3D printing, sometimes referred to as additive manufacturing. This procedure builds up layers of material, such as plastic, metal, or ceramic, until it produces the desired product. 3D printing is used in many industries. It can create intricate medical implants and aerospace parts. It can also make prototypes and models for product creation.
One of the main problems in 3D printing is creating high-quality designs that can be produced precisely and accurately. AutoCAD can help with this. Users can develop precise and in-depth 2D and 3D designs using the robust design program AutoCAD. With AutoCAD for 3D printing, designers and engineers can construct complicated and intricate designs that accurately print.
We can use many features and tools in AutoCAD to produce 3D printing. For instance, users using AutoCAD can produce 3D models of various products, buildings, and objects. Also, they can use AutoCAD to produce technical drawings for 3D printing, such as blueprints or schematics. AutoCAD users can add texture, color, and other features to their designs. These enhancements improve the realism and aesthetic appeal of the designs.
AutoCAD is a strong tool for designing and producing 3D prints overall. By using AutoCAD for 3D printing, designers and engineers can produce intricate and precise designs. Designers and engineers can now create new structures and products. These were impossible to make with conventional manufacturing techniques. The result is a wider range of possibilities for product design. This is thanks to advancements in technologies like 3D printing. The use of AutoCAD can help optimize designs for 3D printing. This opens up a whole new universe of opportunities for product design, engineering, and production.
Explain why AutoCAD is important for 3D printing
Individuals interested in 3D printing must know the power of AutoCAD. This is because AutoCAD provides a number of tools and features specifically designed to facilitate 3D printing. AutoCAD helps designers and engineers create intricate 3D prints. AutoCAD proficiency allows for higher accuracy and precision in prints. Designers and engineers can produce more complex 3D prints with AutoCAD. AutoCAD is a valuable tool for optimizing 3D prints. Becoming proficient with AutoCAD can enhance 3D printing capabilities.
AutoCAD assists users in producing 3D designs and models that they can easily export to 3D printing applications. Users of AutoCAD may produce intricate drawings with the precise measurements, annotations, and other data required for 3D printing. As a result, the 3D printing process makes fewer mistakes and requires less costly and time-consuming adjustments.
Other benefits
AutoCAD for 3D printing enables quick experimentation with various design iterations. Engineers and designers can easily alter designs using AutoCAD’s parametric features. Changes can be viewed in real-time, allowing for quick adjustments. AutoCAD makes it simple and efficient to test multiple design options. Parametric design features in AutoCAD allow for easy modification of 3D designs. AutoCAD’s real-time viewing feature enables instant feedback on design changes. The ability to experiment quickly and efficiently is a major benefit of AutoCAD for 3D printing. AutoCAD’s parametric design capabilities make it easy to test and modify designs. This quickens the design process and enables designers to make the best possible 3D printing with their designs.
AutoCAD also has a number of features that aid in 3D printing design optimization. AutoCAD can identify overhangs and printing problems automatically. It can suggest solutions to fix these issues. AutoCAD is helpful in optimizing designs for 3D printing.
This makes it possible to efficiently generate the final 3D print and guarantees its high quality.
To understand the potential of AutoCAD, individuals interested in 3D printing must use it. AutoCAD enables designers and engineers to produce more intricate and accurate 3D prints, reduce errors, and accelerate the design process. Designers and engineers use AutoCAD for 3D printing. They create novel goods and structures. Conventional manufacturing techniques cannot produce them. AutoCAD makes it possible.
an overview of the main points of the article
We shall examine the potential of AutoCAD for 3D printing in this essay. The article will cover the following major subjects.
First, we will explore how to use AutoCAD for 3D printing. AutoCAD offers fundamental tools for 3D printing. We will cover these tools. They include technical drawing and 3D modeling. You can also add texture and other elements to your designs.
Next, we will cover the significance of setting up your ideas for 3D printing. We will go over how to get an AutoCAD design ready for 3D printing, including error-checking and printability optimization. We will also go through typical problems that could occur during the printing and how to fix them.
Lastly, we’ll go over how to use 3D printing software to print your designs. Let’s discuss 3D printing software options. Learn how to choose the best one for your needs. Streamline your 3D printing process. Change print parameters for optimal results. Select the best material for your design.
Fourth, we’ll offer advice on how to use AutoCAD for 3D printing. This will cover details on how to design for support-free printing, how to speed up and streamline your design, and how to maximize AutoCAD’s parametric design tools.
Finally, we’ll share some tools and resources that you can use when creating with AutoCAD for 3D printing. This will contain details about online groups, courses, and other tools that can help you hone your AutoCAD expertise and expand your 3D printing options.
Understanding AutoCAD for 3D Printing
To develop intricate and precise 3D models that can be printed accurately, designers and engineers need to understand AutoCAD. AutoCAD, a powerful design software, offers a variety of tools and capabilities specially made to enable 3D printing.
Utilizing AutoCAD for 3D printing enables you to produce precise, detailed designs that can be easily imported into 3D printing software, making it one of the main benefits of using this tool. In fact, over 30% of respondents to a recent 3D Hubs poll of 3D printing pros reported using AutoCAD for their 3D printing designs, making it the most popular CAD program for 3D printing.
Moreover, AutoCAD provides a number of tools that aid in 3D printing design optimization. For instance, AutoCAD can automatically identify overhangs and other elements that can lead to printing problems and offer suggestions on how to fix such issues. This makes it possible to efficiently generate the final 3D print and guarantees its high quality.
Moreover, designers and engineers can rapidly and simply experiment with many design variations using AutoCAD’s parametric design features. The use of parametric design techniques, which enable users to make changes to a design and observe the impact of those changes in real time, can help users save up to 63% of their design time, claims Autodesk, the company that created AutoCAD.
In addition, a variety of industries, including architecture, engineering, the production of medical devices, and aerospace, have used AutoCAD to produce high-quality 3D prints. For instance, designers in the medical field have used AutoCAD to create prosthetics and implants that specifically cater to the individual needs of patients.
Explain the features and tools of AutoCAD for 3D printing
A variety of features and tools that are helpful for 3D printing are available in the robust software program AutoCAD. Designers and engineers who wish to accurately and precisely produce high-quality 3D printing must comprehend these fundamental features and tools.
3D models
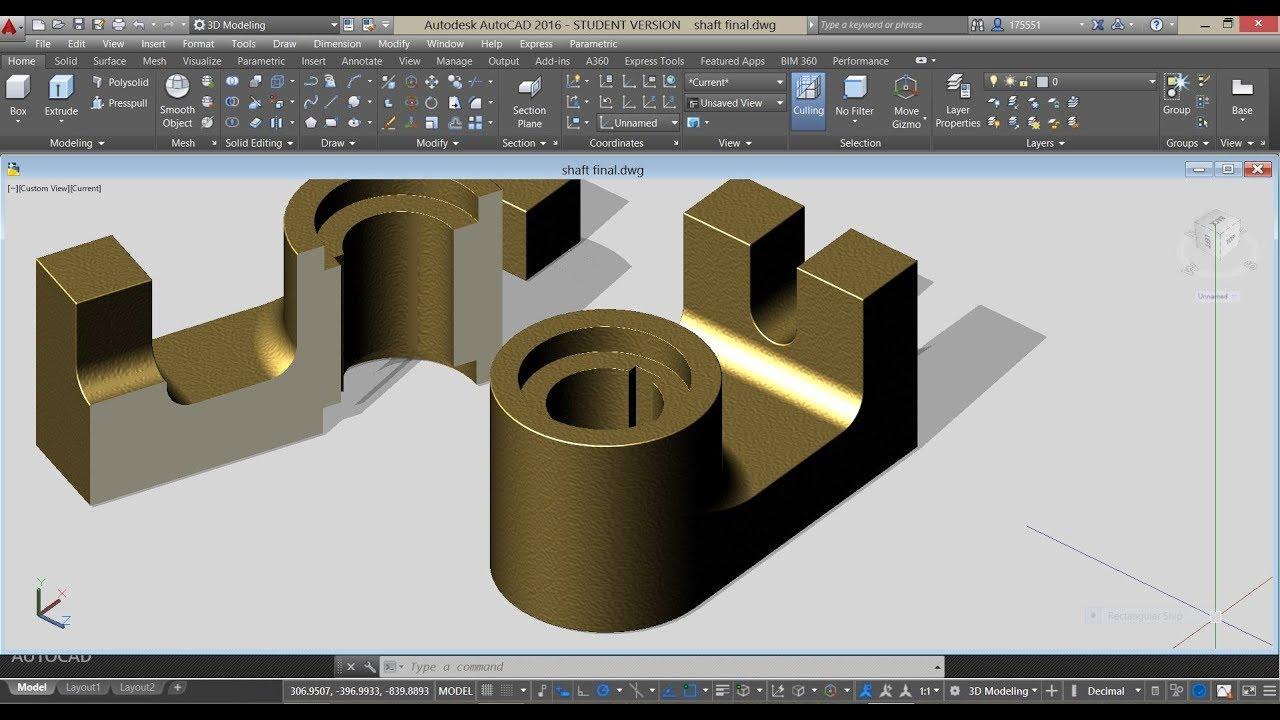
The ability of AutoCAD to produce 3D models is one of its key advantages for 3D printing. Users using AutoCAD may easily build 3D models of things, products, and constructions. Users can use various 3D modeling methods, such as extruding 2D shapes into 3D objects and drawing lines and shapes in 3D space, to create intricate and detailed 3D models. After creating the models, they can export them to 3D printing software for printing.
Technical drawing
Technical drawing creation is another helpful function of AutoCAD for 3D printing. AutoCAD users can produce technical drawings, such as blueprints or schematics, that enable 3D printing. Technical drawings provide great detail on dimensions, measurements, and other crucial specifics required for 3D printing. This results in fewer mistakes during the printing process and reduces the need for costly and time-consuming adjustments.
improve designs for 3D printing
AutoCAD offers a variety of tools that designers can use to improve their designs for 3D printing. For instance, AutoCAD can automatically identify overhangs and other elements that can lead to printing problems, and it can offer suggestions on how to fix such issues. This makes it possible to efficiently generate the final 3D print and guarantees its high quality.
parametric design
Moreover, a number of AutoCAD tools support parametric design, a technique for building 3D models that enable users to specify connections between various design components. This implies that one aspect of a design might automatically affect connected elements, as updates are made to it. This feature reduces the need for manual modifications, saving time and effort.
For designers and engineers who wish to accurately and precisely manufacture high-quality 3D prints, AutoCAD’s fundamental capabilities and tools are crucial. Users can generate intricate and detailed 3D models that are optimal for 3D printing by being aware of these characteristics and tools, resulting in more rapid and affordable 3D printing procedures.
Provide examples of creating complex models
With the help of the robust design program AutoCAD, engineers and designers can accurately and precisely generate complicated 3D models. A variety of industries, including architecture, engineering, the production of medical devices, and aerospace, can apply these 3D models. Real-world examples of complex 3D models made with AutoCAD are provided below:
Aerospace Industry
To generate intricate 3D models of aircraft parts and assemblies, the aerospace industry frequently uses AutoCAD. For instance, one of the biggest airplane producers in the world, Airbus, uses AutoCAD to produce intricate 3D models of the many parts of their aircraft, including the wings, fuselage, and engines. Designers and engineers use these 3D models to streamline the design and production processes and ensure that the finished product complies with stringent safety and quality requirements.
Medical Industry
The production of personalized implants and prostheses has also been done using AutoCAD. For instance, a group of scientists from the University of California, San Francisco used AutoCAD to design and create a unique titanium implant for a patient suffering from a rare bone cancer. Using 3D printing technology, the implant was made to exactly fit into the patient’s remaining bone.
For patients with particular demands, custom prostheses have been designed and made using AutoCAD. For one patient who lost his leg due to bone cancer, a group of researchers at the University of Michigan used AutoCAD to design a prosthetic leg for the patient. The medical team used 3D printing technology to make the model precisely match the surviving limb of the patient in terms of size and shape.
Industries of Architecture
Architects have created intricate 3D models of buildings and structures using AutoCAD. For instance, the designers of the Burj Khalifa, the tallest structure in the world located in Dubai, used AutoCAD in the design process. They utilized 3D modeling tools in AutoCAD to produce intricate and distinctive triangle-shaped building designs. Before construction started, the architects were able to conceptualize and improve the building’s design thanks to the usage of AutoCAD.
Extensive 3D models of buildings and other structures have been produced using AutoCAD. For instance, a group of architects utilized AutoCAD to produce a 3D model of Barcelona, Spain’s iconic Sagrada Familia cathedral. The complicated design of the structure was seen and its construction was optimized using the 3D model.
Engineering Industry
The engineering sector has made considerable use of AutoCAD to build intricate 3D models of machines and other mechanical parts. One of the biggest automakers in the world, General Motors, for instance, designs and tests its car engines using AutoCAD. The 3D models made using AutoCAD aid in engine design optimization and efficiency improvement, which leads to improved fuel economy and lower emissions.
A variety of industries use intricate mechanical parts that have been designed using AutoCAD. For instance, the world-renowned engineering firm Siemens utilized AutoCAD to create a complicated wind turbine rotor blade. The blade’s aerodynamics were optimized and its efficiency was increased using the 3D model.
Jewelry design
To produce sophisticated and detailed 3D models of their designs, jewelry designers have employed AutoCAD. A jewelry designer utilized AutoCAD, for instance, to make a 3D model of a unique engagement ring. Prior to production, the designer may see the finished product in 3D and make any necessary changes to the design.
In conclusion, businesses have used AutoCAD to build intricate 3D models that are geared toward manufacturing and production. Designers and engineers can produce accurate and detailed 3D models utilizing the robust features and capabilities of AutoCAD, which can enhance product design and production procedures.
Autodesk’s AutoCAD enables the development and production of 3D models for a wide range of applications. With its features and resources, designers can create accurate and detailed 3D models that are ready for printing, such as custom prostheses, mechanical parts, architectural models, and even jewelry creations. All in all, you can use AutoCAD to create and print various 3D models.
Preparing Your Design for 3D Printing
A crucial stage in the 3D printing process is setting up your design for the technology. To make sure that your design can be printed precisely and effectively, you must optimize it. When getting your design ready for 3D printing, take into account the following crucial steps:
Check for errors
Verifying for errors is the first step in getting your design ready for 3D printing. This entails employing software tools to spot any design flaws such as overlapping surfaces or non-manifold edges. These mistakes could interfere with the printing procedure and lead to a poor-quality final print.
Optimize for printability
After you have reviewed your design for flaws, the following step is to make it as print-friendly as possible. To make your design print effectively and precisely, you must make the necessary adjustments. For instance, to decrease printing time and material consumption, you might need to change the geometry, add support structures, or rotate the design.
Choose the right 3D printing software
Selecting the best 3D printing program is crucial when getting your design ready for 3D printing. There are numerous sorts of software that each have their own advantages and disadvantages. It’s critical to select the appropriate software for your needs because some programs work better with particular materials or designs.
Adjust print settings
Changing the print settings is a crucial part of getting your design ready for 3D printing. This entails modifying the printing settings to maximize the print quality and printing time, such as layer height, infill density, and printing speed. It’s crucial to refer to the printer’s manual or the manufacturer’s suggestions because these settings can change based on the type of printer and the material used.
By following these procedures, you can guarantee that your design is 3D printing-optimized and that the final print will be of excellent quality. As well as minimizing errors and other printing-related problems, preparing your design for 3D printing can assist to cut down on the time and expense associated with the printing process. Properly preparing your design for 3D printing is a crucial phase in the 3D printing process that can increase the success of your project.
The importance of preparing your AutoCAD design for 3D printing
An important stage in the 3D printing process is preparing your AutoCAD design for 3D printing. You must optimize your design in order for it to print accurately and effectively. Here are some justifications for why it’s critical to prepare your AutoCAD design for 3D printing:
Error reduction
Setting up your AutoCAD design for 3D printing aids in minimizing any printing-related errors. You can make sure that the final print is of the highest quality and free of faults that could impair the performance of the printed object by reviewing your design for flaws like non-manifold edges or overlapping surfaces.
Optimizing printability
To optimize printability and ensure precise and efficient 3D printing of your AutoCAD design, you need to take proactive steps. You can shorten printing times and use less material, making 3D printing more affordable and effective. You can do this by reorienting the design, adding supports, or changing the geometry.
Improving quality
Setting up your AutoCAD design for 3D printing might help to enhance the final print’s quality. You may improve the print quality and guarantee a high-quality final print by modifying print settings including layer height, infill density, and printing speed.
Saving time and money
You can also save time and money by preparing your AutoCAD design for 3D printing. You can limit the need for expensive and time-consuming modifications and make sure that the printing process goes well by cutting errors and improving printability.
In general, getting your AutoCAD design ready for 3D printing is a crucial stage in the process. You can guarantee the success of your 3D printing project and produce high-quality 3D prints that adhere to your design requirements by optimizing your design for printability, eliminating errors, enhancing quality, and saving time and money.
The steps needed to prepare an AutoCAD design for 3D printing
To ensure the accurate and excellent quality of the final print, you must take several crucial steps while preparing an AutoCAD design for 3D printing. The procedures to prepare an AutoCAD design for 3D printing are as follows:
Check for errors
Error-checking is the first step in getting an AutoCAD design ready for 3D printing. This entails examining the design for potential flaws using software tools, such as overlapping surfaces or non-manifold edges. These mistakes may interfere with printing and lead to poor-quality prints in the finished product.
- Use the “Check” command in AutoCAD to check for errors such as non-manifold geometry, overlapping or intersecting faces, and open boundaries.
- Use the “Solid Edit” command to fix errors such as non-manifold edges or overlapping surfaces.
- Use the “3D Print Check” command to check for errors that may affect the printability of the design.
Optimize for printability
When you have reviewed your design for faults, the following step is to optimize it for printability. To print your design effectively and precisely, you need to make changes to it actively. For instance, to cut down on printing time and material consumption, you might need to add support structures, change the geometry, or rotate the design.
- Use the “3D Orbit” command to adjust the orientation of the design to reduce overhangs and minimize support structures.
- Use the “Solid Edit” command to modify the geometry of the design to reduce printing time and material usage.
Choose the right 3D printing software
Selecting the appropriate 3D printing program is crucial when getting an AutoCAD design ready for 3D printing. The software comes in a wide variety of forms, each with unique advantages and disadvantages. Selecting the appropriate software for your needs is critical because certain software is better suited for particular sorts of designs or materials.
- Research different 3D printing software options and choose one that is compatible with your printer and meets your needs.
- Import your AutoCAD design into the 3D printing software and adjust the settings as needed to optimize for print quality and efficiency.
Adjust print settings
Changing the print parameters is a crucial step in getting an AutoCAD design ready for 3D printing. Optimizing the print quality and printing time entails modifying the printing parameters, including layer height, infill density, and printing speed. It’s crucial to refer to the printer’s manual or the manufacturer’s recommendations because these settings can change based on the type of printer and the material utilized.
- Consult the manufacturer’s recommendations for print settings, such as layer height, infill density, and printing speed.
- Use the 3D printing software to adjust the settings to optimize print quality and efficiency.
- Ensure that the settings for the design and the printer being used are appropriate by test printing the design.
Export to the 3D printing software
After optimizing your AutoCAD design for 3D printing, the next step is to export it to 3D printing software. This program will convert your design into a file that is compatible with 3D printers.
- The AutoCAD design should be saved as an STL file, a typical file type for 3D printing software.
- Open the STL file in the 3D printing program, and then change the settings as necessary to achieve the best print quality and productivity.
Print the design
With your 3D printer, you can finally print your design. For the best outcomes, be sure to use the suggested materials according to the manufacturer’s recommendations.
- Follow the manufacturer’s instructions for setting up and operating the 3D printer.
- Load the printing material into the printer and initiate the print job.
- Monitor the print job to ensure that the printer is working correctly and the design is being printed accurately.
These methods will help you make sure that your AutoCAD design is 3D printing-optimized and that the final print is precise and of excellent quality. Preparing an AutoCAD design for 3D printing can reduce the time and money spent on the printing process and avoid errors.
Autocad commands can use in the 3d printing
Here are some other useful commands in AutoCAD that can be used in the 3D printing process:
EXTRUDE
The EXTRUDE command allows users to create a 3D solid or surface by extending a 2D shape along a path. The EXTRUDE command is useful for creating 3D models that can be printed using a 3D printer. You can use the EXTRUDE command to create 3D models from 2D shapes. For example, you can create a cylinder by extruding a circle along a path. To use the EXTRUDE command, you select the shape you want to extrude and specify the height, taper angle, and other parameters.
REVOLVE
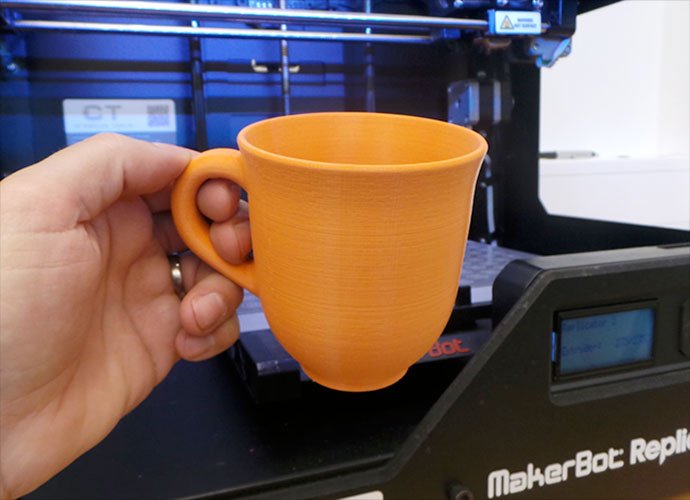
The REVOLVE command allows users to create a 3D solid or surface by revolving a 2D shape around an axis. This command can be useful for creating symmetrical 3D models such as vases, bowls, or cups. The REVOLVE command can be used to create symmetrical 3D models such as vases, bowls, or cups. For example, you can use the REVOLVE command to create a wine glass by revolving a profile around an axis. To use the REVOLVE command, select the profile you want to revolve and specify the axis, angle, and other parameters as needed.
ARRAY
The ARRAY command allows users to create a pattern of objects, such as a grid or a circular array, which can be useful for creating repeated elements in a 3D model. The ARRAY command can be used to create patterns of objects, such as a grid or a circular array. For example, you can use the ARRAY command to create a pattern of bolts or screws in a 3D model. To use the ARRAY command, select the object you want to array and specify the rows, columns, distance, angle, and other parameters as needed.
UNION
The UNION command allows users to combine multiple 3D objects into a single object, which can be useful for creating more complex 3D models. The UNION command can be used to combine multiple 3D objects into a single object. For example, you can use the UNION command to combine two or more 3D solids to create a more complex shape. To use the UNION command, select the objects you want to combine and specify the operation as “Union.”
SUBTRACT
The SUBTRACT command allows users to remove one or more 3D objects from another object, which can be useful for creating holes or voids in a 3D model. The SUBTRACT command can be used to remove one or more 3D objects from another object. For example, you can use the SUBTRACT command to create a hole in a 3D model by subtracting a cylinder from a block. To use the SUBTRACT command, select the object you want to subtract from and the object you want to subtract, and specify the operation as “Subtract.”
INTERSECT
Users can use the INTERSECT command to create a new 3D object by intersecting two or more objects, which is useful for creating more complex shapes or cutting away unwanted material. For example, you can use the INTERSECT command to create a complex shape by intersecting multiple 3D solids. To use the INTERSECT command, select the objects you want to intersect and specify the operation as “Intersect.”
SECTIONPLANE
The SECTIONPLANE command allows users to create a cutting plane through a 3D model, which can be useful for creating 2D views or for analyzing the internal structure of a 3D model. The SECTIONPLANE command can be used to create a cutting plane through a 3D model. For example, you can use the SECTIONPLANE command to create a section view of a 3D model to analyze the internal structure. To use the SECTIONPLANE command, select the location and orientation of the cutting plane and specify the depth and other parameters as needed.
SOLIDEDIT
The SOLIDEDIT command allows users to modify the geometry of 3D solids, which can be useful for fixing errors or optimizing a 3D model for printing. The SOLIDEDIT command can be used to modify the geometry of 3D solids. For example, you can use the SOLIDEDIT command to fillet or chamfer the edges of a 3D model. To use the SOLIDEDIT command, select the object you want to modify and specify the operation and parameters as needed.
THICKEN
The THICKEN command allows users to add thickness to a surface, which can be useful for creating 3D models that are printable using a 3D printer. The THICKEN command can be used to add thickness to a surface. For example, you can use the THICKEN command to create a solid object from a 3D surface model. To use the THICKEN command, select the surface you want to thicken and specify the thickness and other parameters as needed.
Overall, these commands can be useful in creating and preparing 3D models for printing in AutoCAD and can help users optimize their models for printability and produce high-quality 3D prints.
The “3d print check” command in AutoCAD
The “3D Print Check” command is a feature in AutoCAD that allows users to check and analyze 3D models for printability. This command was first introduced in AutoCAD 2015 and later versions.
The “3D Print Check” command offers various parameters that can be used to check and optimize a 3D model for 3D printing. Some of the main parameters include:
- Model Analysis: This parameter allows users to check for common issues that can cause printing problems, such as non-manifold edges or intersecting faces. This analysis can help users identify and fix potential issues before printing.
- Wall Thickness: This parameter allows users to set a minimum wall thickness for the model to ensure that the final print is structurally sound and does not break or fail during printing.
- Print Quality: This parameter allows users to select the desired print quality, which affects the amount of detail and resolution in the final print.
- Material: Users can select the type of material for printing using this parameter, and it can affect the print quality, strength, and durability of the final product.
- Scale: This parameter allows users to adjust the scale of the model, which can be important for ensuring that the final print is the correct size and proportions.
Overall, the “3D Print Check” command is a useful tool for preparing 3D models for printing in AutoCAD. By analyzing and adjusting various parameters, users can optimize their models for printability and produce high-quality 3D prints.
location of these commands in AutoCAD interface with parameters
Here is a table listing the location of the commands mentioned earlier in the AutoCAD interface, along with a brief description and some of their key parameters:
| Command | Location in Interface | Description | Key Parameters |
|---|---|---|---|
| EXTRUDE | Home tab > Solid Editing | Creates a 3D solid or surface by extending a 2D shape along a path. | Height, Taper angle, Twist angle, Path, Thickness |
| REVOLVE | Home tab > Solid Editing | Creates a 3D solid or surface by revolving a 2D shape around an axis. | Axis, Angle, Start angle, End angle, Profile |
| ARRAY | Home tab > Modify | Creates a pattern of objects, such as a grid or a circular array. | Rows, Columns, Levels, Distance, Angle, Polar angle |
| UNION | Home tab > Solid Editing | Combines multiple 3D objects into a single object. | Select objects |
| SUBTRACT | Home tab > Solid Editing | Removes one or more 3D objects from another object. | Select objects |
| INTERSECT | Home tab > Solid Editing | Creates a new 3D object by intersecting two or more objects. | Select objects |
| SECTIONPLANE | View tab > Section | Creates a cutting plane through a 3D model. | Select plane location, Normal, Offsets, Depth, Thickness, Cutline |
| SOLIDEDIT | Home tab > Solid Editing | Modifies the geometry of 3D solids. | Select objects, Operation (e.g. Union, Subtract), Parameters (e.g. Angle, Distance, Fillet radius) |
| THICKEN | Home tab > Solid Editing | Adds thickness to a surface. | Surface, Thickness |
Please note that individual users may customize the interface, and the location of these commands may vary depending on the version of AutoCAD being used. However, this table should give you a general idea of where to find these commands in AutoCAD and some of their key parameters.
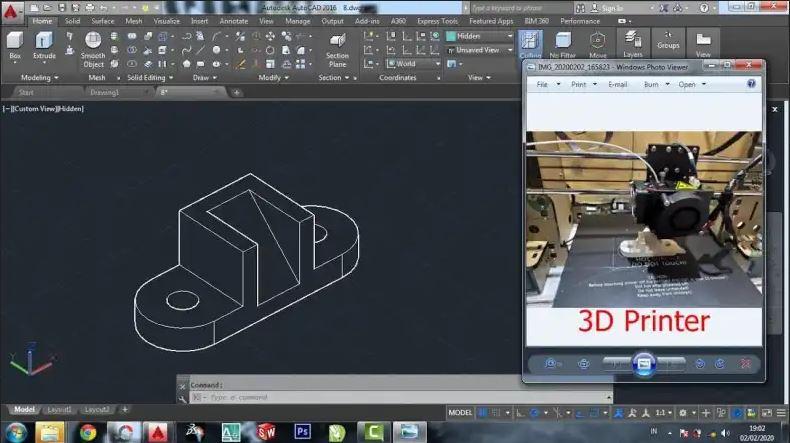
Printing Your AutoCAD Design
You need to print your AutoCAD design after optimizing it for printability and preparing it for 3D printing. You can accomplish this by using a 3D printer, which is a machine that produces real items by depositing layers of material on top of one another using digital files.
You must export your AutoCAD design into an STL (STereoLithography) file, which is a common file type for 3D printing, in order to print it. You can accomplish this by using AutoCAD’s “EXPORT” function and choosing the “STL” file format. Depending on your 3D printer’s requirements, you might also need to change other export options, such as the units and scale.
You can import your design into a 3D printing software tool, such as Cura or Simplify3D, to prepare it for printing and manage your 3D printer’s settings after exporting it as an STL file. To get the desired results, you can alter parameters in the software program for the print quality, kind of material, and infill density.
Lastly, you may start printing by sending the prepared file to your 3D printer. The size and intricacy of your design, as well as the speed and capabilities of your 3D printer, will all affect how long it takes to print. After printing is finished, you can take the printed item out of the printer and clean it as necessary.
In conclusion, in order to print an AutoCAD design, you must export it as an STL file, prepare it for printing using a 3D printing tool, and then send it to your 3D printer. These methods will help you prepare and optimize your design for printing so you can produce high-quality 3D prints of your AutoCAD designs for a variety of uses.
All AutoCAD file formats that we can use in the 3d printing process
AutoCAD supports several file formats that can be used for 3D printing, including:
- DWG (Drawing) – AutoCAD uses DWG as its native file format for 2D and 3D design. Although DWG files cannot be directly used for 3D printing, you can utilize them as a source file to generate 3D models in other formats.
- STL (STereoLithography) – This is the most common file format used for 3D printing. STL files represent a 3D model as a collection of triangles and can be easily exported from AutoCAD.
- OBJ (Wavefront Object) – OBJ files are commonly used in 3D printing and computer graphics applications. They represent 3D models as a collection of vertices, edges, and faces.
- FBX (Filmbox) – FBX is a file format used for 3D modeling, animation, and game development. It supports both 2D and 3D objects and can be used for 3D printing.
- 3DS (3D Studio) – 3DS files are another file format commonly used in 3D printing and computer graphics applications. They represent 3D models as a collection of polygons, vertices, and textures.
- DAE (Digital Asset Exchange) – DAE files are used for 3D modeling and animation and can be used for 3D printing. They represent 3D models as a collection of vertices, edges, and faces.
- IGES (Initial Graphics Exchange Specification) – IGES is a file format used for exchanging CAD data between different systems. It can be used to export 3D models from AutoCAD for use in 3D printing.
Overall, AutoCAD users can use these file formats to export 3D models for 3D printing. You need to choose the appropriate file format for your specific application and ensure that you properly optimize and prepare the exported file for 3D printing.
Formats Table
Here’s a table categorizing some of the most commonly used file formats for 3D printing, along with their importance and typical use cases:
| File Format | Category | Importance | Use Cases |
|---|---|---|---|
| STL | Standard | Very High | The most common format used for 3D printing |
| OBJ | Standard | High | Used for 3D modeling, animation, and computer graphics |
| FBX | Standard | High | Used for 3D modeling, animation, and game development |
| 3DS | Standard | High | Used for 3D modeling, animation, and computer graphics |
| DAE | Standard | High | Used for 3D modeling, animation, and computer graphics |
| DWG | Native | High | The native format for AutoCAD can be used as a source for 3D models |
| IGES | Exchange | Medium | Used for exchanging CAD data between different systems |
| STEP | Exchange | Medium | Used for exchanging CAD data between different systems |
| X3D | Standard | Medium | Used for 3D modeling and animation for the web |
| AMF | Advanced | Low | Supports advanced features such as color and texture |
| PLY | Advanced | Low | Supports advanced features such as color and texture |
Note that the importance and use cases of each file format may vary depending on the specific application and context. However, this table provides a general overview of some of the most commonly used file formats for 3D printing and their typical importance and use cases.
STL format
STereoLithography is referred to as STL. Developed by 3D Systems in 1987, it is a common file format for rapid prototyping and 3D printing. The STL file format represents a 3D model as a collection of tiny, flat triangles called facets, which collectively make up the object’s surface. Apps like AutoCAD, Blender, and SketchUp support the file format, and users can simply export it from most 3D modeling tools.
The 3D printer software uses the triangulated mesh data from an STL file to construct a series of slices that can print one at a time, layer by layer, to produce the desired object. People frequently use STL files for 3D printing due to their simplicity, universality, and compatibility with the majority of 3D printers and software.
Explain how to print designs using AutoCAD and 3D software
You must first export your AutoCAD design as an STL file in order to print it using 3D printing software. Once you have the STL file, you can import it into your 3D printing program to prepare it for printing and manage your 3D printer’s settings.
The first step is to choose the 3D printing software that best suits your requirements. There are numerous possibilities, including both free and premium programs like Simplify3D and ZBrush, as well as programs like Ultimaker Cura and Autodesk Fusion 360. The fundamental procedures for importing and setting up an STL file for printing are often similar across all programs, however each one has its own interface and capabilities.
You may start setting up the file for printing once you’ve chosen your software and imported your STL file. To prepare the model for 3D printing, you may need to revise the model, add supports, and change variables such as print quality, material type, and infill density.
You can send the file to your 3D printer for printing after completing the preparation. Several 3D printing software applications come with built-in capabilities to interact with your printer and manage the printing process. Even some computer applications include simulation features that let you see how printing will look and make changes before printing.
All things considered, combining AutoCAD with 3D printing software is a potent approach to producing high-quality 3D prints from your ideas. You can quickly print your AutoCAD designs using a 3D printer and produce tangible items for a variety of uses by following the procedures explained above and choosing the right software for your needs.
common printing issues and solutions
While AutoCAD is a powerful tool for creating 3D models, there are some issues that can arise when using it for 3D printing. Some of these issues include:
Non-manifold geometry
Non-manifold geometry refers to 3D models that have errors in their geometry, such as intersecting or overlapping surfaces, holes, or open edges. The Non-manifold geometry can cause issues during the 3D printing process, such as incomplete or distorted prints. To address this issue, it is important to use the “3D Print Check” command in AutoCAD to check for and repair any non-manifold geometry in your models.
File size
Large file sizes can be an issue when exporting 3D models from AutoCAD for 3D printing. This can cause issues such as slow file transfer times or difficulty loading the model into 3D printing software. To address this issue, it is important to optimize your model’s geometry and reduce its complexity where possible. This can be done using tools such as the “Simplify” command in AutoCAD.
Scale and units
Scale and unit discrepancies can cause issues when exporting 3D models from AutoCAD for 3D printing. For example, if you design a model on a small scale and then try to print it at a larger size, it may not print correctly. To avoid this issue, you need to ensure that you set the correct scale and units for your model before exporting it as an STL file. To do this, use the “UNITS” command in AutoCAD.
Compatibility
Some 3D printers may not be compatible with certain file formats or software programs used to prepare the models for printing. To address this issue, it is important to research the compatibility of your 3D printer and software with the file formats and software programs you are using and to select options that are compatible with your printer.
Thin walls
Thin walls can be an issue when printing 3D models created in AutoCAD, as they may not print properly or may be too fragile to use. To address this issue, it is important to ensure that your model’s walls are thick enough to print properly. You can use the “Offset” command in AutoCAD to create thicker walls around your model’s geometry.
Overlapping geometry
Overlapping geometry can cause issues when 3D printing, as it can cause the printer to print multiple layers in the same location, resulting in a messy or incomplete print. To address this issue, it is important to check for and remove any overlapping geometry in your model before exporting it for 3D printing.
Unsupported geometry
Unsupported geometry, such as overhangs or protruding features, can be an issue when 3D printing, as they may not print correctly without additional support structures. To address this issue, it is important to add support structures to your model where needed, using software such as Meshmixer or Cura.
Printer limitations
Each 3D printer has its own limitations in terms of resolution, maximum print size, and material compatibility. To address this issue, it is important to research the capabilities of your 3D printer and design your models accordingly, taking into account any limitations that may affect the printing process.
By addressing these issues and taking the necessary steps to prepare your AutoCAD designs for 3D printing, you can create high-quality 3D prints that meet your needs and specifications.
Tips and Tricks for AutoCAD and 3D Printing
Building 3D models using AutoCAD is a potent tool that can be applied to many other things, such as 3D printing. There are a few tactics and suggestions that can assist make the process of making 3D prints from AutoCAD drawings more effective and efficient, even though it can be difficult and time-consuming.
Optimize your designs for 3D printing
It’s critical to keep in mind the particular needs of 3D printing when creating your 3D models in AutoCAD. This entails thinking about things like support structures, print direction, and wall thickness. You can lower the possibility of mistakes or problems occurring during the printing process and make sure your prints turn out beautifully by optimizing your designs for 3D printing.
Use the 3D Print Check command
Use the 3D Print Check command to examine your designs for problems including non-manifold geometry, gaps, and intersecting surfaces. AutoCAD provides a 3D Print Check tool. Before exporting your ideas for 3D printing, run this command to assist guarantee correct and effective printing.
Understanding Support-Free Printing
Designing for 3D printing typically requires the use of support structures to hold up overhanging sections of the model during printing. However, with the right design techniques, you can create models that can be printed without supports. By designing with overhangs of less than 45 degrees and avoiding intricate geometries that require support, you can achieve support-free prints that are faster and easier to produce.
Optimize the Design for Speed and Efficiency
The time it takes to print a 3D model can be significantly reduced by optimizing the design for speed and efficiency. This includes using geometric primitives and standard shapes, as well as avoiding non-manifold geometries and unnecessary detail. By simplifying the design and reducing the number of triangles and facets, you can minimize print times and increase efficiency.
Take Advantage of AutoCAD’s Parametric Design
Capabilities AutoCAD’s parametric design capabilities allow you to modify the dimensions of your design with ease, making it easy to create variations and adjust your design for different printing scenarios. By using parametric design, you can save time and avoid the need to manually adjust each individual element of your design.
Create and Use Templates
Creating templates is a great way to streamline your 3D printing workflow and ensure consistency across multiple designs. By setting up a template that includes common elements such as dimensions, units, and layers, you can save time and avoid mistakes when creating new designs.
Use Libraries of Common Elements and Shapes
AutoCAD includes a wide range of libraries of common elements and shapes that can be used in 3D designs. By taking advantage of these libraries, you can save time and ensure consistency across your designs. This is especially useful for creating designs that require repeated elements, such as architectural features or mechanical parts.
Utilize AutoCAD’s 3D Modeling Tools
AutoCAD includes a wide range of 3D modeling tools that can be used to create complex geometries and shapes. By mastering these tools, you can create more intricate and detailed designs that are optimized for 3D printing.
Use Layering to Organize Your Design
Layering is an essential tool for organizing and managing complex 3D designs. By using layers to group similar elements, you can easily turn layers on and off as needed, and avoid cluttering your design with unnecessary detail.
Experiment with different materials
Try out various materials; 3D printing enables the use of a wide range of materials, each of which has special qualities and traits. You can make prints with a variety of textures, strengths, and liabilities by experimenting with various materials. By doing so, you can make prints that are customized to your particular requirements and expand the possibilities for your AutoCAD designs.
Research your printer and software
Do some research on your printer and software because every 3D printer and software package has different specifications and constraints. Research your printer and software to make sure that your designs are suitable and that you are using the optimum parameters for your particular system if you want to achieve the best outcomes from your AutoCAD designs.
Learn from others
There are many creative designers and makers in the 3D printing community who are willing to impart their knowledge and skills. You can benefit from other designers’ experiences and get insightful knowledge about the world of 3D printing by joining online forums and groups, going to events and workshops, and establishing connections with other designers.
Overall, by using these pointers and strategies, you may enhance your AutoCAD designs and produce precise 3D printers that suit your needs. There is always the opportunity to learn, develop, and push the limits of what is possible with this new technology, regardless of your level of experience with 3D printing.
Additional resources for designing with AutoCAD for 3D printing
Designing with AutoCAD for 3D printing can be a challenging process that necessitates a thorough comprehension of both the program and 3D printing concepts. Thankfully, there are many tools at their disposal to assist designers and builders in producing excellent ideas that are suited for 3D printing.
Autodesk Knowledge Network
The Autodesk Knowledge Network, which offers a variety of lessons, videos, and articles on designing for 3D printing, is a useful tool for AutoCAD users. This includes instructions on how to use particular AutoCAD tools and features step-by-step as well as advice on how to make designs as print-ready as possible.
AutoCAD App Store
The AutoCAD App Store is an additional helpful tool that offers a variety of add-ons and plugins that can facilitate your 3D printing workflow. For instance, the 3D Print Preview plugin offers a thorough overview of your design before printing, while the STL Export for AutoCAD plugin enables you to export your drawings in STL format.
additional software programs
In addition to these tools and resources, there are other additional software programs and tools that can be used to assist in creating AutoCAD for 3D printing. Software like Netfabb or Meshmixer, for instance, can be used to fix and prepare 3D models for printing, while Cura or Simplify3D can be used as a slicer to create G-code and manage the printing procedure.
continuous learning process
Last but not least, it’s critical to keep in mind that designing for 3D printing is a process of ongoing learning, and there is always more to learn and explore. You may keep enhancing your ideas and making 3D prints that are high-quality and match your requirements by participating in online communities, going to workshops and events, and trying out new tools and techniques.
In conclusion, designing with AutoCAD for 3D printing can be aided by a variety of resources and extra tools. Designers and makers can produce high-quality designs that are tailored to their particular requirements and specifications and are optimized for 3D printing by utilizing these tools and continuing to learn about and experiment with new methodologies.
Conclusion
In summary, designers and makers can use AutoCAD as an effective tool to produce intricate 3D drawings that are customized for 3D printing. By learning the fundamentals of 3D printing and how to use AutoCAD’s capabilities and tools, they can create high-quality designs tailored to their specific needs and requirements and optimize them for printing.
Nonetheless, designing for 3D printing may be a challenging process that necessitates close attention to detail and a thorough comprehension of the program as well as the fundamentals of 3D printing. It is crucial to give your design the attention it needs to be ready for printing, including thorough error checking and print-friendly design optimization.
Designers and makers can benefit from various resources and extra tools in addition to using AutoCAD’s features and tools to streamline their processes and produce high-quality designs. This includes tools like software programs and plugins that can speed up the design and printing process, as well as online communities and tutorials.
In the end, creating with AutoCAD for 3D printing necessitates a willingness to explore, pick up new skills, and work with others in the 3D printing community. Designers and makers may continue to push the limits of what is possible with 3D printing and produce ideas that are both functional and visually beautiful by remaining up to speed with the most recent trends and techniques, as well as through sharing information and resources with others.
In conclusion, AutoCAD is a flexible and potent tool for 3D printing, and designers and makers may produce high-quality designs that satisfy their particular demands and requirements if they have the necessary abilities, information, and resources. The future of 3D printing is promising as long as innovation and cooperation are prioritized, and AutoCAD will undoubtedly be crucial in determining that future.
Summarize the main points of the article
The article offers a thorough introduction to utilizing AutoCAD for 3D printing, including topics like comprehending the fundamentals of the technology, using AutoCAD’s features and capabilities to produce 3D models, preparing designs for 3D printing, and troubleshooting frequent problems. The article also includes advice on how to design for 3D printing, such as understanding support-free printing, speeding up and streamlining designs, utilizing parametric design features, and making use of libraries and 3D modeling software. The page also offers links to extra information and tools, such as the Autodesk Knowledge Network, the AutoCAD App Store, and third-party software programs, to assist in designing with AutoCAD for 3D printing. In order to produce high-quality designs that adhere to particular requirements and criteria, the essay ultimately highlights the significance of ongoing learning and collaboration within the 3D printing community.
The importance of understanding AutoCAD for 3D printing
Understanding AutoCAD for 3D printing is essential for designers and makers who want to create high-quality designs that are optimized for printing. By utilizing AutoCAD’s features and tools, designers can create complex 3D models that meet specific needs and specifications. The article covers various aspects of using AutoCAD for 3D printing, including preparing designs for printing, troubleshooting common issues, and utilizing resources and additional tools. It also provides tips and tricks for designing for 3D printing, such as using support-free printing and optimizing designs for speed and efficiency.
AutoCAD is a versatile software that can help designers and makers achieve their vision and create designs that push the boundaries of what is possible with 3D printing. By continuing to learn and experiment with new techniques, and sharing knowledge and resources with others in the 3D printing community, designers and makers can unlock the full potential of AutoCAD for 3D printing and create designs that are both functional and aesthetically pleasing.
How to create complex 3D models using AutoCAD for 3D printing?
- Plan and Sketch your Design
Start by sketching your design on paper and visualizing how it will look as a 3D model. This will help you plan the steps you need to take in AutoCAD to create your design.
- Set up your Workspace in AutoCAD
Make sure your workspace is set up for 3D modeling. This means selecting the 3D Modeling workspace and setting up your layers, viewport, and view settings.
- Create your Base Model
Begin by creating a 3D solid or surface model that serves as the base for your design. Use the appropriate AutoCAD tools to create the basic shape of your design.
- Add Detail and Features
Add details and features to your design using AutoCAD’s advanced 3D modeling tools. This may include creating complex shapes, adding textures, or designing intricate geometries.
- Optimize your Model for 3D Printing
Once your design is complete, optimize it for 3D printing by checking for errors and adjusting the model to ensure printability. This may include adding supports, adjusting wall thickness, or reducing overhangs.
- Export your Model as an STL File
Export your completed design as an STL file, which is the standard format used by most 3D printers. Make sure to check the file size and quality to ensure a successful print.
- Send your File to the 3D Printer
Finally, send your STL file to the 3D printer and begin the printing process. Make sure to follow the printer’s instructions for loading and printing your model, and monitor the print to ensure a successful outcome.
By following these steps, you can create complex 3D models using AutoCAD for 3D printing. Remember to take your time and pay attention to detail throughout the design and printing process, and don’t hesitate to reach out to the 3D printing community for help and advice.
FAQs
No, but some experience with AutoCAD or other 3D modeling software can be helpful. There are many resources available to help you learn and improve your skills, including online tutorials, classes, and workshops.
Yes, AutoCAD can be used to create designs for most types of 3D printing, including FDM, SLA, and SLS printing. However, it is important to understand the specific requirements of each type of printing and adjust your design accordingly.
To optimize your AutoCAD design for 3D printing, you should check for errors and adjust the model to ensure printability. This may include adding supports, adjusting wall thickness, or reducing overhangs.
The most common file format for 3D printing with AutoCAD is STL, but other formats such as OBJ and 3MF may also be used. It is important to understand the requirements of your specific printer and choose the appropriate file format.