Introduction
Fusion360 is a strong and adaptable piece of software that may be utilized for many different design and engineering tasks. Its capacity to support 3D printing, which has grown in popularity in recent years, is one of its main advantages. This tutorial focuses on Fusion360 tools for 3D printing. It will teach you to produce high-quality prints using Fusion360. You don’t need prior design experience or 3D printing knowledge to benefit from this course.
Everything from fundamental design ideas and methods to exporting your models for printing and fixing typical problems will be covered. Let’s get started!
Autodesk, a top software provider in the design and engineering sector, created Fusion360, a potent and adaptable program. It may be applied to many other design and engineering tasks, and it works especially well for 3D printing. Autodesk develops software solutions for the design and engineering sector. Fusion360 is a core product. It’s popular among designers and engineers for 3D printing projects. Fusion360 has a user-friendly interface and an extensive feature set. This article will explore its features and tools for 3D printing.
A brief overview of 3D printing, why Fusion360 is a great tool for it?
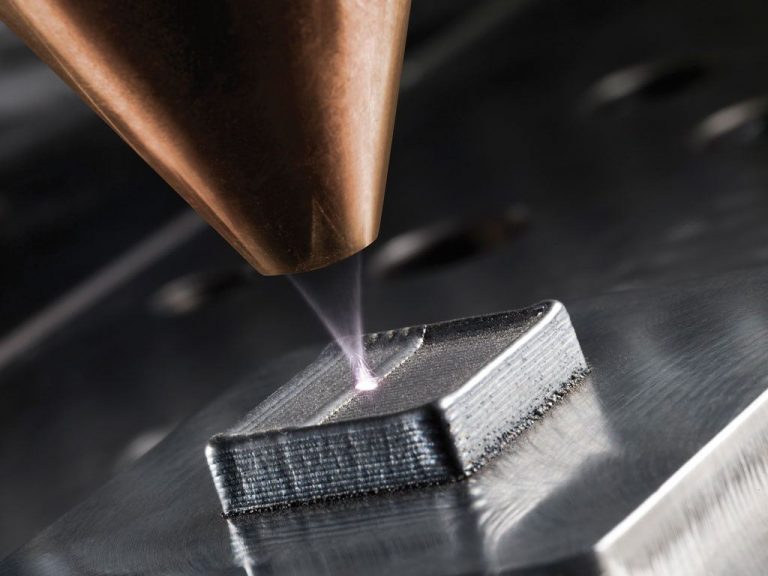
3D printing is a process of creating 3D objects from a digital file. It is also known as additive manufacturing. The material is added layer by layer to create the object. This technology has changed the approach to design and manufacturing. It allows for greater customization, speed, and efficiency in production. From prototyping to end-use parts, 3D printing is widely used. Designers and engineers across various industries use this technology.
Fusion360 is an excellent tool for 3D printing due to its robust feature set and intuitive user interface. Fusion360 is a parametric design software. You create designs using sketches and features that you can easily modify and adjust. Designers can use this software to optimize complex 3D models for 3D printing. Fusion360 has a built-in slicer. It allows users to prepare their models for printing. It can be done with just a few clicks. In addition, it is very easy to use. With the ability to create custom supports and optimize print settings, users can achieve high-quality prints with minimal hassle.
Fusion360 also has a large community of users who share their knowledge, tips, and designs online. The community is helpful for all users, from beginners to experts. It provides support for design principles and advanced techniques. Fusion360 has powerful tools and a supportive community. Users can achieve their 3D printing goals with this combination.
Goals of the tutorial and what readers will learn
The goal of this comprehensive tutorial is to provide readers with a solid foundation in using Fusion360 for 3D printing. Readers will learn basic design principles and techniques for 3D printing in this tutorial. They will learn how to use Fusion360 to create, optimize, and prepare models for printing. By the end of this tutorial, they will be able to print their designs using a 3D printer. This tutorial is designed to provide readers with the necessary knowledge to get started with 3D printing using Fusion360.
We will cover everything from starting with Fusion360 to troubleshooting common issues in 3D printing. In addition, readers will learn how to set up their 3D printers, load filaments, and start printing their designs. This tutorial is suitable for beginners and experienced users of Fusion360. It aims to provide the knowledge and skills required to create high-quality 3D prints. So, let’s get started!
Getting Started with Fusion360
To get started with Fusion360, you can easily download and install the software on your computer. You can download it for free from the Autodesk website, and it’s available for both Windows and Mac operating systems. After installation, sign in by creating an account to start using the software.
Fusion360 designed the user interface to be intuitive and easy to use. The toolbar is at the top with menus and icons to access features and tools. To begin a new design, click “New Design” and choose the type you want. Fusion360 offers a range of design options, including solid modeling, surface modeling, and parametric modeling.
One of the great features of Fusion360 is its ability to work with a variety of file formats. This makes it easy to import and export files between different software programs. To import a file, simply click on the “Insert” button and select the type of file you want to import. Fusion360 supports a wide range of file formats, including STL, OBJ, and STEP.
Downloading and installing Fusion360
You must download and install the software on your computer before you can use Fusion360. Thankfully, this procedure is short and simple. Go to the Fusion360 download page on the Autodesk website first. Click the “Download now” button after choosing your operating system (Windows or Mac). After you finish downloading, open the installer and follow the on-screen directions to install the program. During installation, you may need to create an account. The account will activate your license. It will provide access to the software’s features and updates.
Following installation, you can immediately launch Fusion360 and begin using the program. Start with some of the fundamental tutorials and practice exercises offered by Autodesk if you’re new to 3D modeling. You can use these tutorials to become more familiar with Fusion360’s user interface and its different tools and capabilities. Fusion360 may be downloaded and installed easily and quickly overall. A potent 3D modeling tool will be available to you after installation, allowing you to bring your creations to life.
Basic overview of the user interface and key features
Fusion360 designed its user interface to be user-friendly, especially for beginners. The toolbar, located at the top of the screen, provides quick access to the software’s tools and features. You can customize the workspace to your liking, where you will create and modify your 3D models. Fusion360 offers support for different modeling techniques. Solid modeling, surface modeling, and parametric modeling are some examples. The variety of modeling techniques is one of the core strengths of Fusion360.
We use solid modeling to create objects with a specific volume, such as cubes, spheres, and cylinders. On the other hand, surface modeling generates objects defined by their surface area, like curves, planes, and patches. By changing a few parameters or variables, parametric modeling enables you to build models that are easily modifiable.
A variety of editing and manipulating capabilities are also provided by Fusion360 for your models. The tools in Fusion360 have various capabilities. Some are straightforward like move, scale, and rotate. Others are more complex like fillet, chamfer, and shell. Using the software’s robust sketching feature, you can draw 2D shapes and profiles to construct 3D models.
The versatility of file formats that Fusion360 can work with makes it a valuable feature as well. The program supports a broad variety of file types, including STL, OBJ, and STEP. This makes it simple to deal with files made in other 3D modeling software packages. Fusion360 is a tool for 3D modeling and printing. It has a flexible and strong design. The user interface is important. The software includes many key features. Overall, Fusion360 is a great option. Fusion360 includes everything you need to produce high-quality 3D printing, regardless of your level of experience.
Setting up a new project in Fusion360
Setting up a new project in Fusion360 is a simple and straightforward process. First, open the software and click on the “New Design” button. This will bring up a dialog box where you can select the type of design you want to create, such as a new part, assembly, or drawing.
Once you’ve selected the type of design, you’ll need to give your project a name and select the units of measurement you want to use. You can also choose to start with a blank project or select a template to use as a starting point. Fusion360 includes a range of templates for common designs such as phone cases, car parts, and jewelry.
After you’ve set up your new project, you can start designing your model using the software’s various tools and features. Fusion360 includes a range of modeling techniques, such as solid modeling, surface modeling, and parametric modeling, as well as a powerful sketching tool for creating 2D shapes and profiles.
In addition to its design tools, Fusion360 also includes a range of tools for preparing your models for 3D printing. This includes a built-in slicer that allows you to adjust settings such as layer height, infill density, and print speed to optimize your prints for quality and speed.
Overall, setting up a new project in Fusion360 is quick and easy. With a range of design templates and tools at your disposal, you’ll be able to start creating high-quality 3D prints in no time.
Designing for 3D Printing in Fusion360
Designing for 3D printing in Fusion360 requires a different approach than traditional 3D modeling. While many of the same modeling techniques apply, there are some important considerations to keep in mind when designing for 3D printing.
One of the most important considerations is the design’s printability. Ensure that the design can print without errors or issues, such as steep overhangs or unsupported areas that may collapse during printing. Fusion360 includes a range of tools and features for checking your model’s printability, such as the “Make” feature that simulates the printing process and highlights potential issues.
Another important consideration when designing for 3D printing is optimizing the model’s geometry for printing. This means minimizing the number of triangles and edges in the model’s mesh to reduce printing time and improve surface quality. Fusion360 includes a range of tools for simplifying and smoothing your model’s geometry, such as the “Simplify” and “Smooth” tools.
In addition to printability and geometry considerations, it’s also important to consider the material and printing technology you’ll be using. Different materials and printing technologies have different requirements and limitations, such as minimum wall thicknesses and maximum resolutions. Fusion360 includes a range of tools and features for adjusting your model’s settings to match your chosen material and printing technology, such as the “Print Setup” feature that allows you to adjust settings such as layer height, infill density, and print speed.
Overall, designing for 3D printing in Fusion360 requires careful consideration and planning. You can create high-quality, printable designs optimized for your chosen material and printing technology using a range of tools and features available in Fusion360.
Understanding the 3D printing process and its limitations
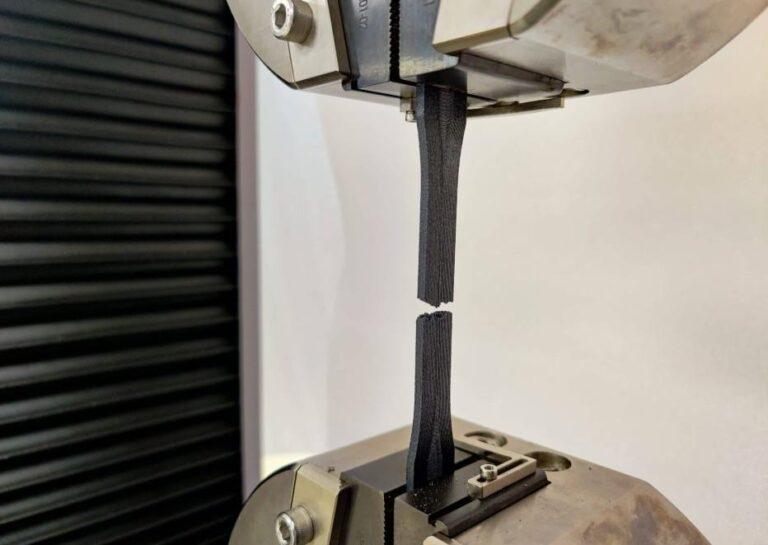
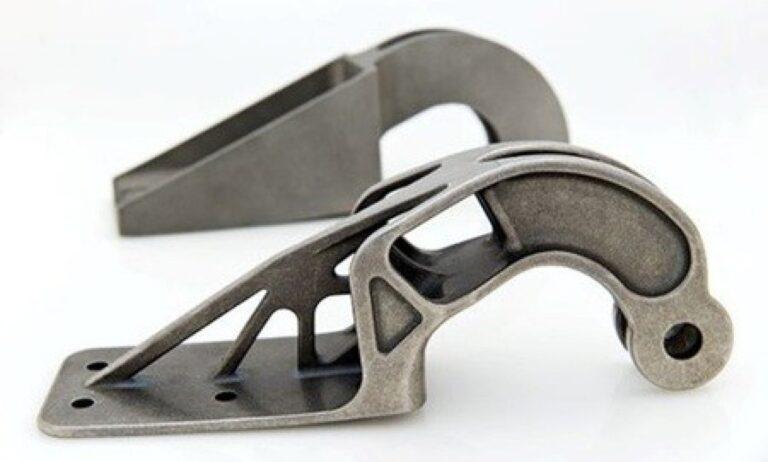
Before going into designing for 3D printing in Fusion360, it’s vital to have a fundamental understanding of the 3D printing process and its constraints. A 3D printer uses a variety of materials, including plastics, metals, and ceramics, layer by layer to construct an object as part of the additive manufacturing process. Although 3D printing has revolutionized the manufacturing sector by enabling the development of sophisticated and complicated geometries, there are several limitations to the technology that designers need to be aware of.
The print resolution or layer height is one of 3D printing’s most important restrictions. This is the thickness of each layer of material that the printer uses to construct the product. The level of detail and smoothness in the final print depends on the layer height, regardless of the printer’s ability to achieve high resolutions. The build volume or the maximum size of the object that can be printed is also restricted in 3D printing. This can differ significantly based on the printer’s type and setup, but it’s crucial to keep this in mind when creating huge or intricate objects.
While designing for 3D printing, material constraints are another crucial factor to take into account. Various materials have various strengths, characteristics, and printing needs. For instance, some materials could need a heated bed or enclosure to prevent warping, while others might need a particular kind of nozzle or extruder to print properly.
Ultimately, understanding the restrictions of the 3D printing process is vital for designing effective prints in Fusion360. You can make sure that your prints are of great quality and prepared for 3D printing by keeping these constraints in mind and designing with them in mind.
Basic design principles for 3D printing
Follow several basic design rules to ensure a good print while designing for 3D printing in Fusion360. These guidelines assist in optimizing the design for 3D printing and guarantee high-quality prints.
Designing for manufacturability is one of the most crucial design tenets for 3D printing. This entails creating the model with the manufacturing process in mind, taking into consideration the resolution and constraints of the printer. Avoiding overhangs, planning for support structures, and making sure the model fits within the printer’s build volume can all help achieve this.
Another key design principle for 3D printing is to optimize the geometry for printing. To speed up printing and enhance surface quality, this entails reducing the model’s mesh’s number of triangles and edges. Also, it’s critical to check that the model has an appropriate wall thickness and that all features print correctly and without any problems.
In addition to these guidelines, it’s crucial to design with the intended application in mind. For instance, if the model will be under strain or stress, it’s crucial to make sure the design is sturdy enough to endure these pressures. It’s also critical to think about the design’s aesthetics and make sure it adheres to any branding or style guidelines.
Overall, adhering to these fundamental design guidelines for Fusion360 3D printing will help to guarantee a successful and high-quality print. You may produce optimum designs that match your particular needs and requirements by designing with manufacturability, geometry, and application in mind.
Creating basic shapes and forms in Fusion360
A vital talent for 3D printing design is the ability to create simple shapes and forms in Fusion360. Fortunately, utilizing a range of tools and capabilities, the software makes it simple to build a variety of shapes and forms.
The primitive shapes tool in Fusion360 is one of the simplest methods for producing shapes and forms. You can rapidly build simple forms like cubes, spheres, cylinders, and cones using this tool. After creating a basic design, you can utilize Fusion360’s different editing tools to tweak and perfect it to meet your needs.
The sketch tool in Fusion360 is an additional helpful tool for designing shapes and forms. This tool allows you to create 2D sketches and then rotate or extrude them to form 3D shapes. The sketch tool comes in handy for adding unique features and shapes that the primitive shapes tool can not provide.
Furthermore, you can use a variety of modeling tools in Fusion360 to create more complex shapes and forms. Among them are filleting, sweeping, and lofting instruments. By combining these tools, you may construct a wide range of complicated shapes and forms that are ideal for 3D printing.
Create basic shapes and forms in Fusion360 with the intended design function in mind. Make sure the design is 3D printing-optimized and take into account the size, strength, and level of detail needed for the finished print. These recommendations will help you produce the fundamental forms and shapes that will serve as the basis for your 3D printing design.
Using sketches, extrusions, and other tools to create more complex designs
You can use sketches, extrusions, and other tools to build more complicated designs once you have a basic understanding of how to generate shapes and forms in Fusion360. These tools can help you produce unique designs that suit your individual requirements.
With Fusion360, sketches are a highly effective tool for producing intricate designs. You can use sketches to build 2D outlines, and then rotate or extrude them to create 3D shapes. The sketch tool enables you to generate custom forms and characteristics that are not possible using the primitive shapes tool, and the extrude and revolve tools enable you to convert those sketches into 3D shapes.
The pattern tool in Fusion360 is an additional helpful tool for producing intricate designs. While building complicated designs, this tool’s ability to create patterns of features or components can help you save a ton of time and work. There are many different techniques to make patterns, including linear, circular, and rectangular patterns.
Fusion360’s fillet and chamfer tools are very helpful for producing intricate designs. With the help of these tools, you can add fillets or chamfers to edges or corners, giving your design a more polished and finished appearance.
It’s crucial to keep the design’s intended usage in mind when using drawings, extrusions, and other tools to construct more intricate designs in Fusion360. Make sure the design is 3D printing-optimized and take into account the size, strength, and level of detail needed for the finished print. You can construct intricate patterns that satisfy your unique demands and requirements by adhering to these rules.
Optimizing designs for printing, such as adding supports or reducing material usage
Optimizing your designs for 3D printing is crucial to ensuring that your prints come out as intended. There are several things you can do to optimize your designs for printing, such as adding supports, reducing material usage, and ensuring that the design is suitable for the printing process and material you are using.
One of the most common ways to optimize designs for 3D printing is by adding support. In Fusion360, you can manually add supports or let the software automatically generate them to stabilize and prevent the print from collapsing or warping. Another way to optimize designs for 3D printing is by reducing material usage. You can achieve this by using features like shells or infill patterns, which create a hollow interior for the print. By using less material, you can save on printing costs and reduce the weight of the finished product.
Fusion360 also includes a range of tools for optimizing designs for 3D printing, such as the mesh workspace and the simulation tool. You can import and manipulate mesh files in the mesh workspace to optimize designs created in other software. The simulation tool allows you to simulate the printing process and identify potential issues or problems before you start printing.
When optimizing designs for 3D printing, it’s important to consider the printing process and material you are using. Different printing processes and materials have different requirements and limitations, and optimizing your design for one may not be suitable for another. You can create designs optimized for printing and produce high-quality prints every time by understanding these requirements and limitations.
Preparing Models for 3D Printing
Making sure your prints are precise and of good quality requires you to prepare your models for 3D printing as a crucial step in the design process. You can take a number of actions in Fusion360 to get your models ready for 3D printing.
The first step is to use the Analysis workspace to check the model for flaws and faults. You can conduct numerous tests and simulations in this workspace to find any problems that might impair the quality of your print, such as thin walls or intersecting surfaces. After finding any problems, you can use the repair tool to rectify them before printing.
The next step is to accurately position the model for printing. This entails setting up the model to reduce the requirement for supports and increase the strength and stability of the printed object. You can use the align tool in Fusion360 to position the model accurately and confirm alignment with the print bed.
After orienting the model, the user generates supports to add stability and prevent warping during printing. Supports are structures that the user adds to the model. Depending on your preferences and needs, Fusion360 allows you to manually or automatically generate supports. Export the model as an STL file after you orientate it and include supports in it. The model’s size, shape, and support placement are all included in this file format, which is compatible with the majority of 3D printers.
Exporting models from Fusion360 for 3D printing
You can easily export models from Fusion360 for 3D printing by following a few simple procedures. You can create a file that is compatible with your 3D printer by following these steps once you have prepared your model for printing and are ready to export it.
Selecting the model you wish to export is the first step. To choose the model in Fusion360, click on it in the design workspace or select it from the model tree. After selecting the model, use the export command to create an STL file. You can select the file format and printer-friendly settings in the export dialog box. You can control the model’s resolution, orientation, and scale, as well as where the supports and other elements are located.
After making your selections for the export options, click the export button to create the STL file. Depending on your choices, you can save this file on your computer or send it straight to your 3D printer. It’s necessary to keep in mind that various printers may need various file formats or settings, therefore it’s crucial to check your printer’s specs before exporting the file. Before printing the final version, it’s a good idea to run a test print or verify the model using a 3D printing simulator to make sure it’s correct and error-free.
With Fusion360, exporting models for 3D printing is a simple and straightforward process that allows you to obtain amazing results every time. You can produce high-quality prints that adhere to your standards and requirements by taking the time to prepare and optimize your models and by following these instructions.
Basic troubleshooting and preparing for common issues in 3D printing
Although 3D printing has revolutionized the manufacturing industry, it can sometimes be a finicky process. As such, it’s essential to be prepared for common issues that might arise during the printing process. Here are some basic troubleshooting tips to help you overcome common 3D printing issues:
First, it’s essential to ensure that the printer’s bed is level and that the print nozzle is clean before starting a print job. Uneven bed levels or dirty nozzles can cause issues with adhesion and lead to failed prints.
Second, it’s crucial to check the temperature settings of the printer to ensure that the temperature is appropriate for the type of filament being used. If the temperature is too high or too low, it can cause issues with the printing process, resulting in failed prints or low-quality results.
Another common issue with 3D printing is stringing, which occurs when the printer leaves thin strings of filament between different parts of the print. To overcome this issue, you can adjust the retraction settings on the printer or reduce the printing temperature slightly.
Lastly, it’s important to make sure that the model you’re printing is optimized for 3D printing. This means ensuring that the design is suitable for the printer’s capabilities and that the model has the required supports, infill, and other features to make it stable and strong.
By following these basic troubleshooting tips and preparing for common issues in 3D printing, you can improve the overall quality of your prints and achieve better results every time. Additionally, keeping a log of common issues and solutions can help you overcome similar issues in the future and streamline the printing process.
Slicing models and generating G-code for printing
Once your 3D model is ready, the next step is to slice it and generate a G-code for printing. Slicing refers to the process of dividing the 3D model into thin layers and creating a set of instructions for the printer to follow. This is where you define the print settings, such as layer height, infill density, support material, and print speed.
To slice your model, you can use the built-in slicer in Fusion360 or use an external slicer software such as Cura, Simplify3D, or PrusaSlicer. Most slicers have default settings for common printers and filaments, but you can customize these settings to fit your specific needs.
Once you have sliced your model, the slicer software will generate a G-code, which is a set of instructions that the printer uses to create the physical print. G-code tells the printer where to move the print head, when to extrude filament, and how fast to move, among other things.
Before sending the G-code to the printer, it’s essential to review it carefully to ensure that it’s correct and free from errors. You can use G-code viewer software to visualize the layers and preview the print before sending it to the printer.
Overall, slicing models and generating G-code for printing is an essential step in the 3D printing process. By using the right settings and reviewing the G-code carefully, you can achieve high-quality prints and optimize the printing process for efficiency and reliability.
Setting up printer parameters and slicing profiles
Setting up printer parameters and slicing profiles is a crucial step in 3D printing, as it determines the quality and accuracy of the final print. Printer parameters include nozzle diameter, bed size, and printing temperature, among others, while slicing profiles define the print settings such as layer height, infill density, and support material.
To set up printer parameters and slicing profiles in Fusion360, you can use the built-in 3D printer configuration tool. This tool allows you to select your printer model and define its parameters, such as the nozzle diameter and bed size. You can also specify the printing temperature and speed, as well as other advanced settings such as retraction and cooling.
Once you have set up your printer parameters, you can create slicing profiles to optimize your prints for different materials and geometries. Slicing profiles can be created and saved for future use, allowing you to quickly switch between different profiles depending on your needs.
When creating slicing profiles, it’s important to consider factors such as print time, material usage, and print quality. For example, a higher infill density can make the print stronger, but it also increases print time and material usage.
Overall, setting up printer parameters and slicing profiles is a critical step in 3D printing, as it allows you to optimize your prints for quality, efficiency, and reliability. By experimenting with different settings and profiles, you can achieve high-quality prints and improve your overall 3D printing experience.
Printing Your Design
Once you have prepared your model and generated G-code using your slicing software, the next step is to print your design. Before starting the print, make sure that your 3D printer is properly calibrated and that the build platform is level. You should also check that the printer nozzle is clean and free from any debris that may interfere with the print.
To start the print, load the G-code file into your 3D printer and begin the printing process. Depending on the complexity and size of your design, the printing process can take anywhere from a few minutes to several hours.
While the print is in progress, it’s important to monitor it closely to ensure that everything is running smoothly. Check that the layers are adhering properly and that there are no signs of warping or shifting. You should also check the printer’s temperature and make any necessary adjustments to ensure that the print is not overheating or cooling too quickly.
Once the print is complete, carefully remove the finished object from the build platform. Use a scraper or spatula to gently pry it loose, being careful not to damage the print or the build platform.
Finally, inspect the finished print for any defects or imperfections. If necessary, you may need to sand or trim any rough edges or excess material. With a little practice and patience, you can produce high-quality prints using Fusion360 and your 3D printer.
Setting up your 3D printer
Before you start printing, it’s important to properly set up your 3D printer. This includes assembling the printer and connecting it to your computer or network. The setup process will vary depending on the make and model of your printer, so be sure to consult the manufacturer’s instructions or online resources for guidance.
One important aspect of printer setup is calibration. This involves adjusting the printer’s various axes to ensure that they are correctly aligned and that the print bed is level. Calibration is essential for achieving high-quality prints, so be sure to follow the manufacturer’s instructions carefully and perform calibration regularly.
In addition to calibration, you will need to install any necessary software or drivers to operate your printer. Most 3D printers come with their own software or can be operated using third-party slicing software like Cura or Simplify3D. Take some time to familiarize yourself with the software and its features before you start printing.
Another important consideration is choosing the right filament for your printer. Filament is the material that your printer uses to create your prints, and there are many different types and colors available. Some common materials include PLA, ABS, and PETG. Be sure to choose a filament that is compatible with your printer and suited to your specific printing needs.
Overall, setting up your 3D printer can be a time-consuming process, but it is essential for producing high-quality prints. By carefully following the manufacturer’s instructions and taking the time to properly calibrate and configure your printer, you can ensure that your prints come out looking their best.
Loading filament and preparing the build plate
Once you’ve set up your 3D printer, the next step is to load filament and prepare the build plate. Filament is typically loaded into the printer using a spool holder, which feeds the filament into the extruder. Before you start loading filament, it’s important to make sure that your printer is properly heated to the appropriate temperature for the type of filament you’re using. This information can usually be found on the filament packaging or in the printer’s documentation.
Once your printer is heated up, you can load the filament into the extruder. This typically involves feeding the end of the filament into a small hole or tube, and then using the printer’s software to extrude a small amount of filament to ensure that it’s flowing smoothly. Be sure to follow the manufacturer’s instructions carefully, as the process can vary depending on the make and model of your printer.
In addition to loading filament, you’ll also need to prepare the build plate for printing. This involves ensuring that the plate is clean and level, and that any necessary adhesion aids (such as glue or tape) are applied. It’s important to get the build plate level and flat to ensure that your prints adhere properly and come out looking their best.
Before you start printing, be sure to run a test print to ensure that everything is working correctly. This can help you identify any issues or misalignments before you start on a larger or more complex print. With the filament loaded and the build plate prepared, you’re ready to start printing your design!
Using your generated G-code to start the print
It’s time to begin the print after you’ve sliced your model and created the G-code. You must send the G-code to your 3D printer in order to accomplish this. Depending on the brand and model of your printer, you can usually do this using a USB cable or an SD card.
Make sure your printer is calibrated correctly and that the build plate is level before beginning the print. This will make it more likely that your print will look great and adhere to the build plate correctly.
When everything is ready to go and set up, you may start printing by using the printer’s software. Typically, to do this, choose the correct file from the printer’s menu before choosing “Print” or “Start.” Before beginning the actual print, the printer will start heating the extruder and building platform to the proper temperature.
To make sure everything is going smoothly during the print, it’s crucial to keep an eye on the printer. You should also be ready to make modifications or troubleshoot any problems that develop, such as altering the print speed or temperature or pausing the print if necessary.
Before removing the finished print, it’s crucial to let the build plate cool down after the print is finished. This will assist prevent the print from warping or deforming as it cools. Your produced G-code can be used to produce stunning 3D printing with a little perseverance and skill.
Basic troubleshooting and maintenance tips for 3D printing
While 3D printing can be a fun and rewarding hobby, it’s not always smooth sailing. Here are some basic troubleshooting tips and maintenance practices to keep in mind:
- Filament Issues: One common issue is filament jams or tangles. To prevent this, make sure that the filament is fed into the printer correctly and that it is not tangled. If you experience a jam, you may need to clear the filament and start the print again.
- Layer Adhesion Issues: If your print is not sticking to the build plate, or if the layers are separating, you may need to adjust the build plate leveling or temperature settings. Additionally, adding a raft or support structure to your model can help improve adhesion.
- Print Quality Issues: If your prints are coming out looking rough or misshapen, you may need to adjust your printing speed, temperature, or extruder settings. Additionally, ensuring that your printer is properly calibrated can help improve print quality.
- Maintenance: To keep your 3D printer in good working order, it’s important to clean and maintain it regularly. This may include lubricating moving parts, cleaning the build plate and extruder, and replacing worn parts such as nozzles or belts.
By keeping these tips in mind, you can help ensure that your 3D printing projects are successful and that your printer lasts for many years to come.
Conclusion
In conclusion, Fusion360 is an incredibly powerful tool for 3D printing, and with the right knowledge and techniques, it can help you create amazing designs that are optimized for printing. By following the steps outlined in this tutorial, you can learn the basics of designing for 3D printing, understand the 3D printing process and its limitations, and troubleshoot common issues that may arise. With a little bit of practice and experimentation, you’ll be well on your way to creating stunning 3D-printed objects that are limited only by your imagination. So what are you waiting for? Download Fusion360 today and start creating!
Recap of what readers learned
Readers have learned the essentials of utilizing Fusion360 for 3D printing during this article. They have learned how to set up new projects, design for 3D printing, optimize designs for printing, and get models ready for printing. They have also learned how to download and install the software. Also, readers have learned how to set up their 3D printer, load filament, and use their created G-code to begin a print. They have also acquired some basic 3D printing maintenance and troubleshooting advice. With this information, readers are prepared to take on new 3D printing projects with confidence and produce prints that are high-quality and well-suited to the task at hand.
Additional resources and where to go next for more advanced 3D printing techniques
There are numerous extra resources available to assist you in developing your abilities and learning more complex techniques if you’re interested in learning more about the world of 3D printing. The official Autodesk Fusion360 website is an excellent place to start as it has a ton of tutorials, forums, and other tools to help you get the most of the program. In addition, you may interact with other enthusiasts and gain knowledge from their experiences by participating in one of the many online communities and forums devoted to 3D printing.
Consider purchasing a more sophisticated 3D printer or researching various 3D printing technologies, such as SLA or SLS printing, if you need more sophisticated methods. To get diverse qualities in your prints, try with various materials, like as metal or carbon fiber.
The field of 3D printing is large and continually changing, so there’s always something new to discover. There are innumerable tools and groups available to help you advance your abilities and accomplish your 3D printing goals, whether you’re a newbie just getting started or an experienced 3D printing enthusiast.
Keep Learning and Experimenting: Final Thoughts on Using Fusion360 for 3D Printing
As we wrap up this comprehensive tutorial on using Fusion360 for 3D printing, it’s important to remember that learning and experimentation are key to mastering this exciting technology. 3D printing opens up a world of possibilities for creating custom, one-of-a-kind objects, and with Fusion360, the design process has never been easier or more accessible.
So, if you’re new to 3D printing, don’t be intimidated by the learning curve. With the resources and tips provided in this tutorial, you have everything you need to get started and begin creating your own 3D designs. And for those who are already experienced 3D printing enthusiasts, there’s always more to learn and explore, from advanced design techniques to new materials and technologies.
Above all, the key to success with 3D printing is to stay curious, stay creative, and never be afraid to experiment. With Fusion360 and the world of 3D printing at your fingertips, the possibilities are endless, so keep learning, keep experimenting, and see where your imagination takes you.
How To Design and 3D Print Your Custom Phone Case with Fusion360
Time needed: 30 minutes
In this section, we will walk you through the step-by-step process of designing and 3D printing your custom phone case using Fusion360.
- Measure and Create New Project
Measure your phone’s dimensions and create a new project in Fusion360 with those measurements as the starting point.
- Sketch Basic Shape
Use the sketch tools in Fusion360 to create the basic shape of your phone case.
- Extrude and Add Thickness
Use the extrude tool to add thickness to your phone case, making sure to leave room for buttons, ports, and other phone features.
- Add Design Features
Add any additional design features, such as text or patterns, using the various tools in Fusion360.
- Check and Adjust the Design
Check your design for any potential printing issues, such as overhangs or unsupported features, and make adjustments as needed.
- Export as STL File
Export your design as an STL file and import it into your slicing software.
- Set Printer Parameters and Generate G-code
Set up your printer parameters and slicing profile, and generate the G-code for your print.
- Prepare the 3D Printer and Start Print
Load your filament and prepare your build plate, then start the print using your generated G-code.
- Remove and Clean Up Print
Once the print is complete, remove the phone case from the build plate and clean up any support structures or imperfections.
- Test and Enjoy Custom Phone Case
Finally, test your new custom phone case on your phone and enjoy your personalized creation!
FAQs
Fusion360 offers a wide range of tools and features specifically designed for 3D printing, including easy-to-use design tools, built-in slicing capabilities, and compatibility with a wide range of 3D printers. Additionally, it allows for seamless integration between the design and printing stages of the process, making it a powerful tool for both beginners and advanced users.
Yes! Fusion360 is designed to be user-friendly and intuitive, even for those with limited design experience. Its built-in tools and features make it easy to create basic shapes and forms, and there are plenty of tutorials and resources available online to help users learn more advanced techniques. With some practice and experimentation, even beginners can create impressive designs for 3D printing using Fusion360.
Fusion360 can seem intimidating at first, but it offers a user-friendly interface and a wealth of tutorials and resources to help beginners learn. With some practice and dedication, even those new to 3D printing can quickly master the basics.